Invite Team Members
Overview:
As an Admin, you can invite new users to the PBX.IM account.
Let's break down how you can invite new team members and edit their profile.
Table of Contents
Introduction to users
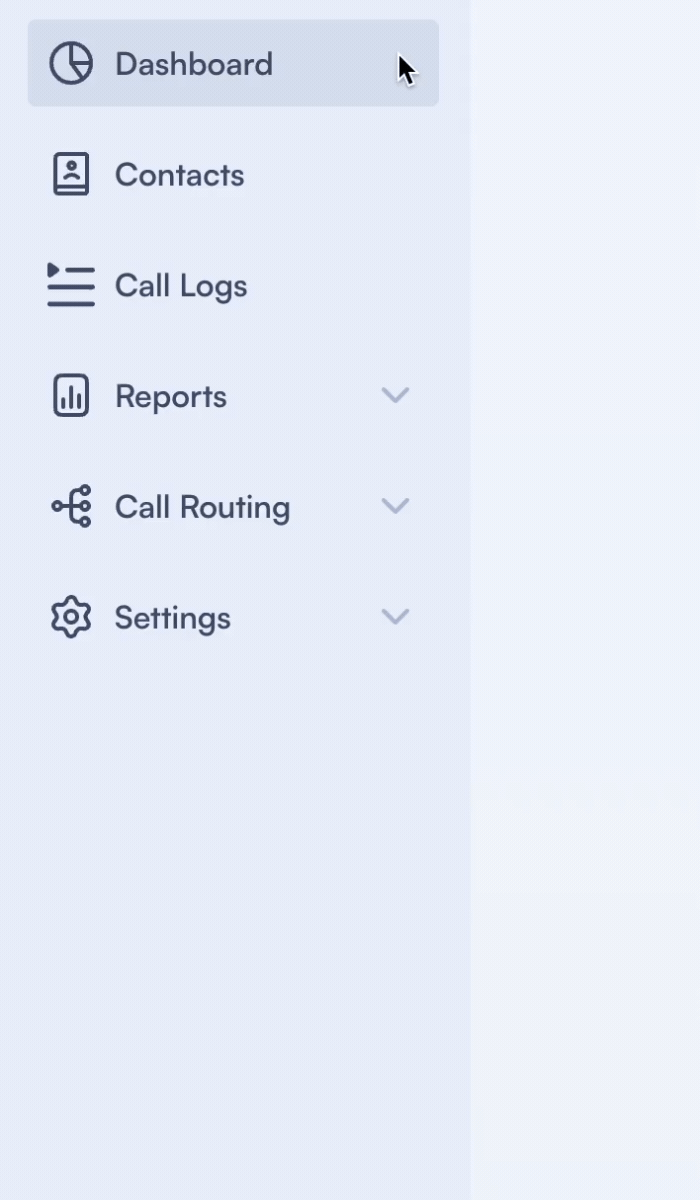
Access Users
- Log into PBX.IM Dashboard
- Go to Settings
- Click on Users
Setup a user
If you want to add a new user, all you have to do is follow the path: Settings→ Users→ Click on the ''Add User'' button.
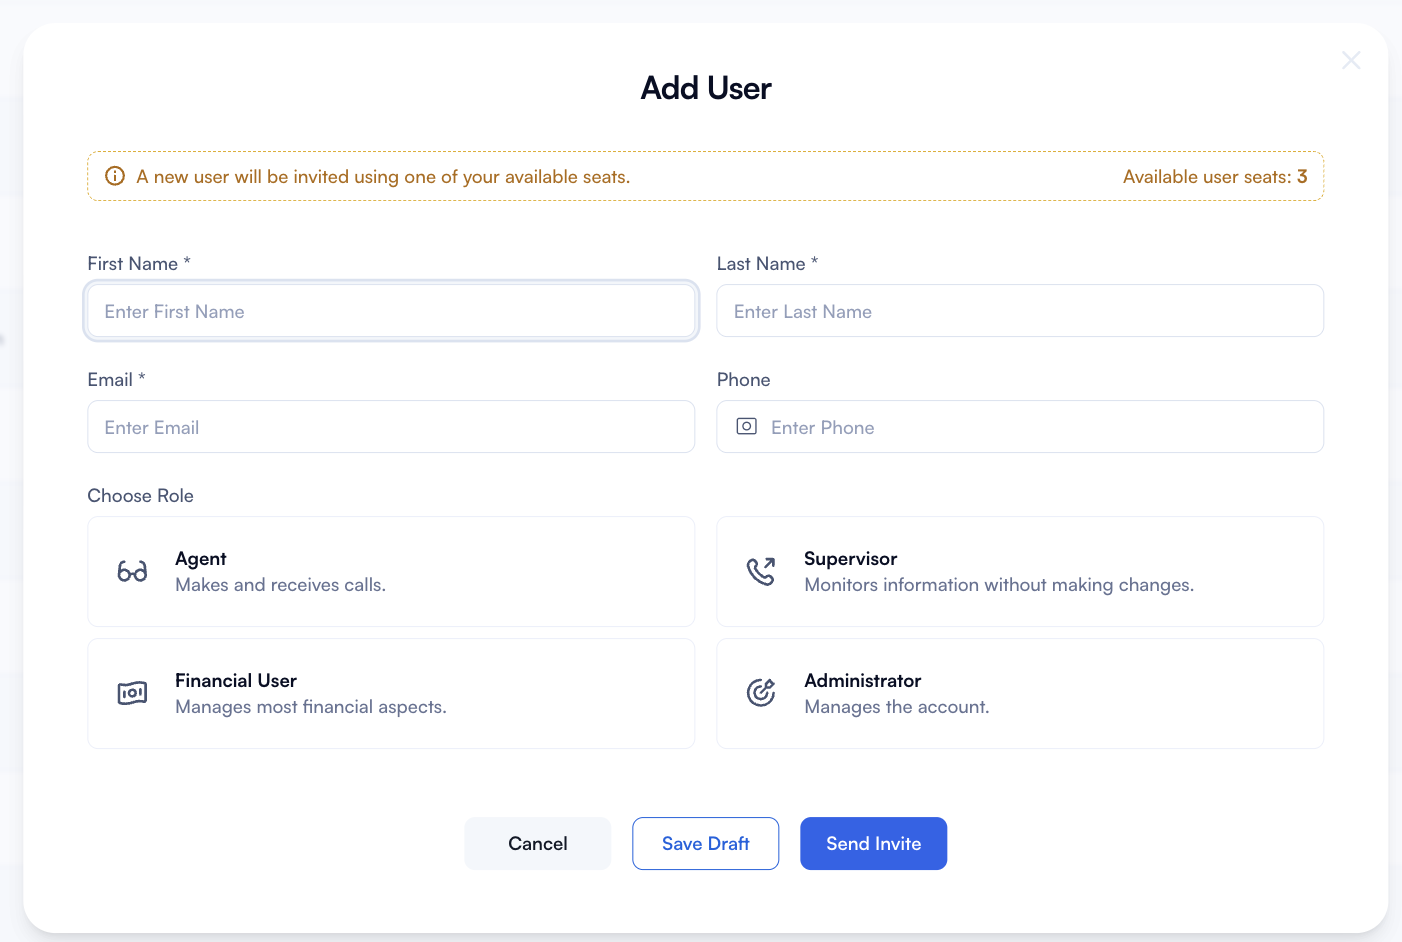
Here's what each section means and how to use it:
| Type | How to use it |
|---|---|
| First name and last name | Enter the user's first name in the "First Name" field and their last name in the "Last Name" field. These fields are mandatory, as indicated by the asterisk (*). |
| Enter the user's email address in this field. Ensure the email address is valid and correctly formatted, as the invitation to access the system will be sent to this address. | |
| Phone | Enter the phone number of the user you want to invite to the system. Be sure to include the number in the international format. |
| Base Role | For each team member, you will have to choose one role. You have 4 options: Caller - Makes and receives calls, Supervisor - Monitors the information without making changes, Financial - Manages financial information, Admin - Manages all aspects of the account. |
| Send invitation right away | You can choose to send the invitation email immediately. The users you've added will receive an email with a sign-up link and details about their role. |
| Seat Management | Right next to the option to add new users, you have the Manage seats button. Seats are licenses required for each team member in the account's subscription. Each member needs a paid seat, which grants them access to the PBX system based on the role that was selected for them. The Manage Seats allows you to manage it for the users you've added in the system. |
| Save | Click SAVE to apply all your changes. |
Users type You can choose from 4 roles, each offering different access levels within the PBX.IM account, as detailed below:
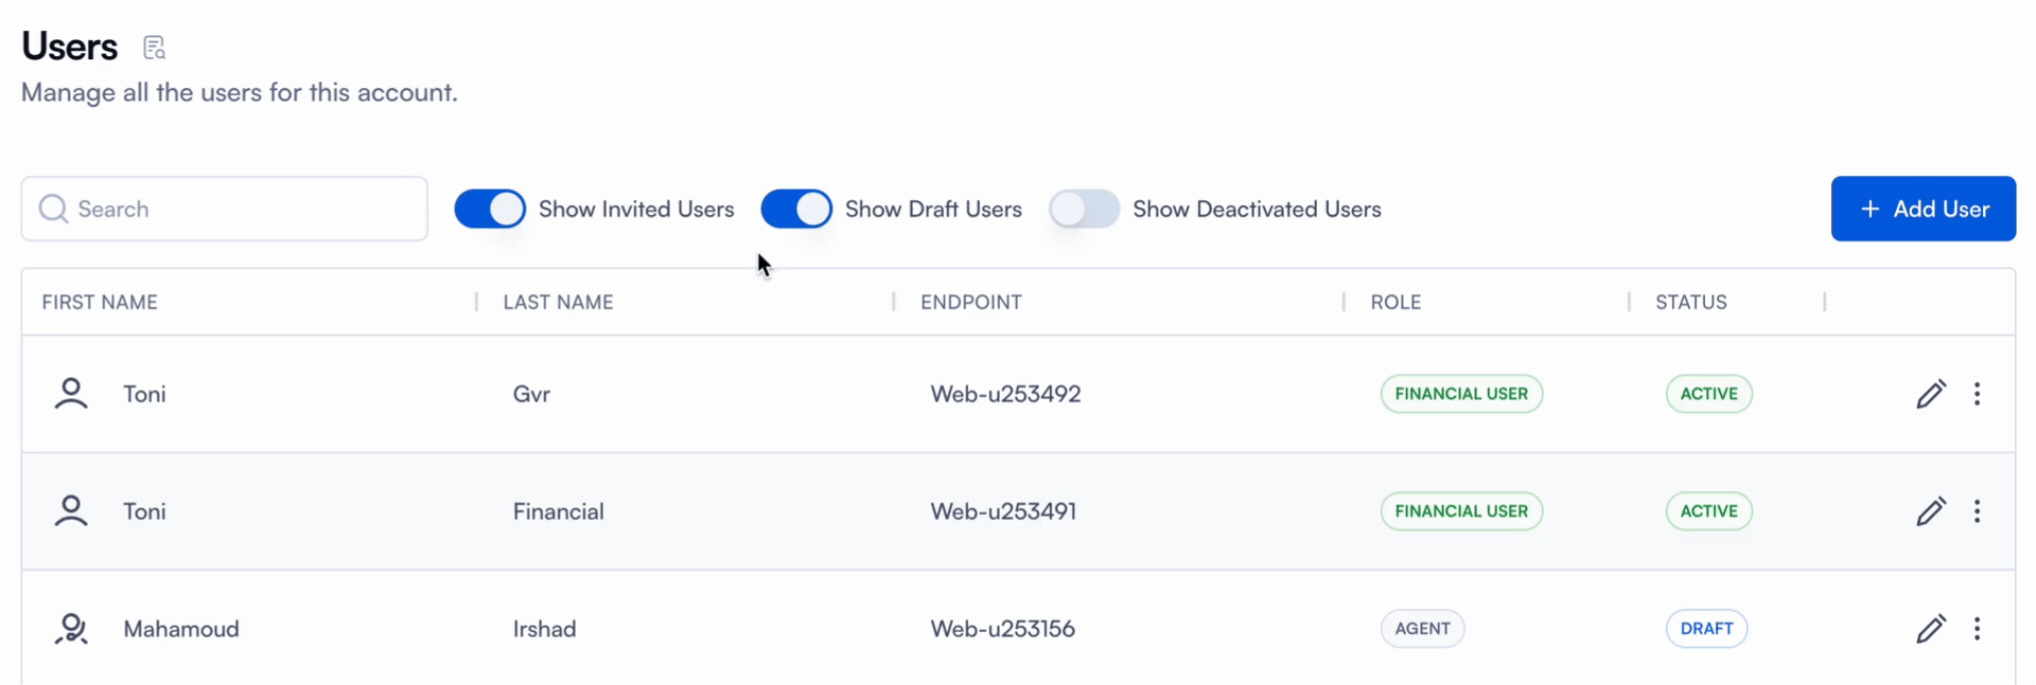
Another thing that you can do is filter the list of users by status. You can select multiple statuses (e.g. to see all active and invited users only).
Edit a user
If you want to make changes after adding a user, there are a few steps you should follow.
- Go to the Main Page
- Click on the pencil icon
For each type of user, you will see different fields that need to be completed.
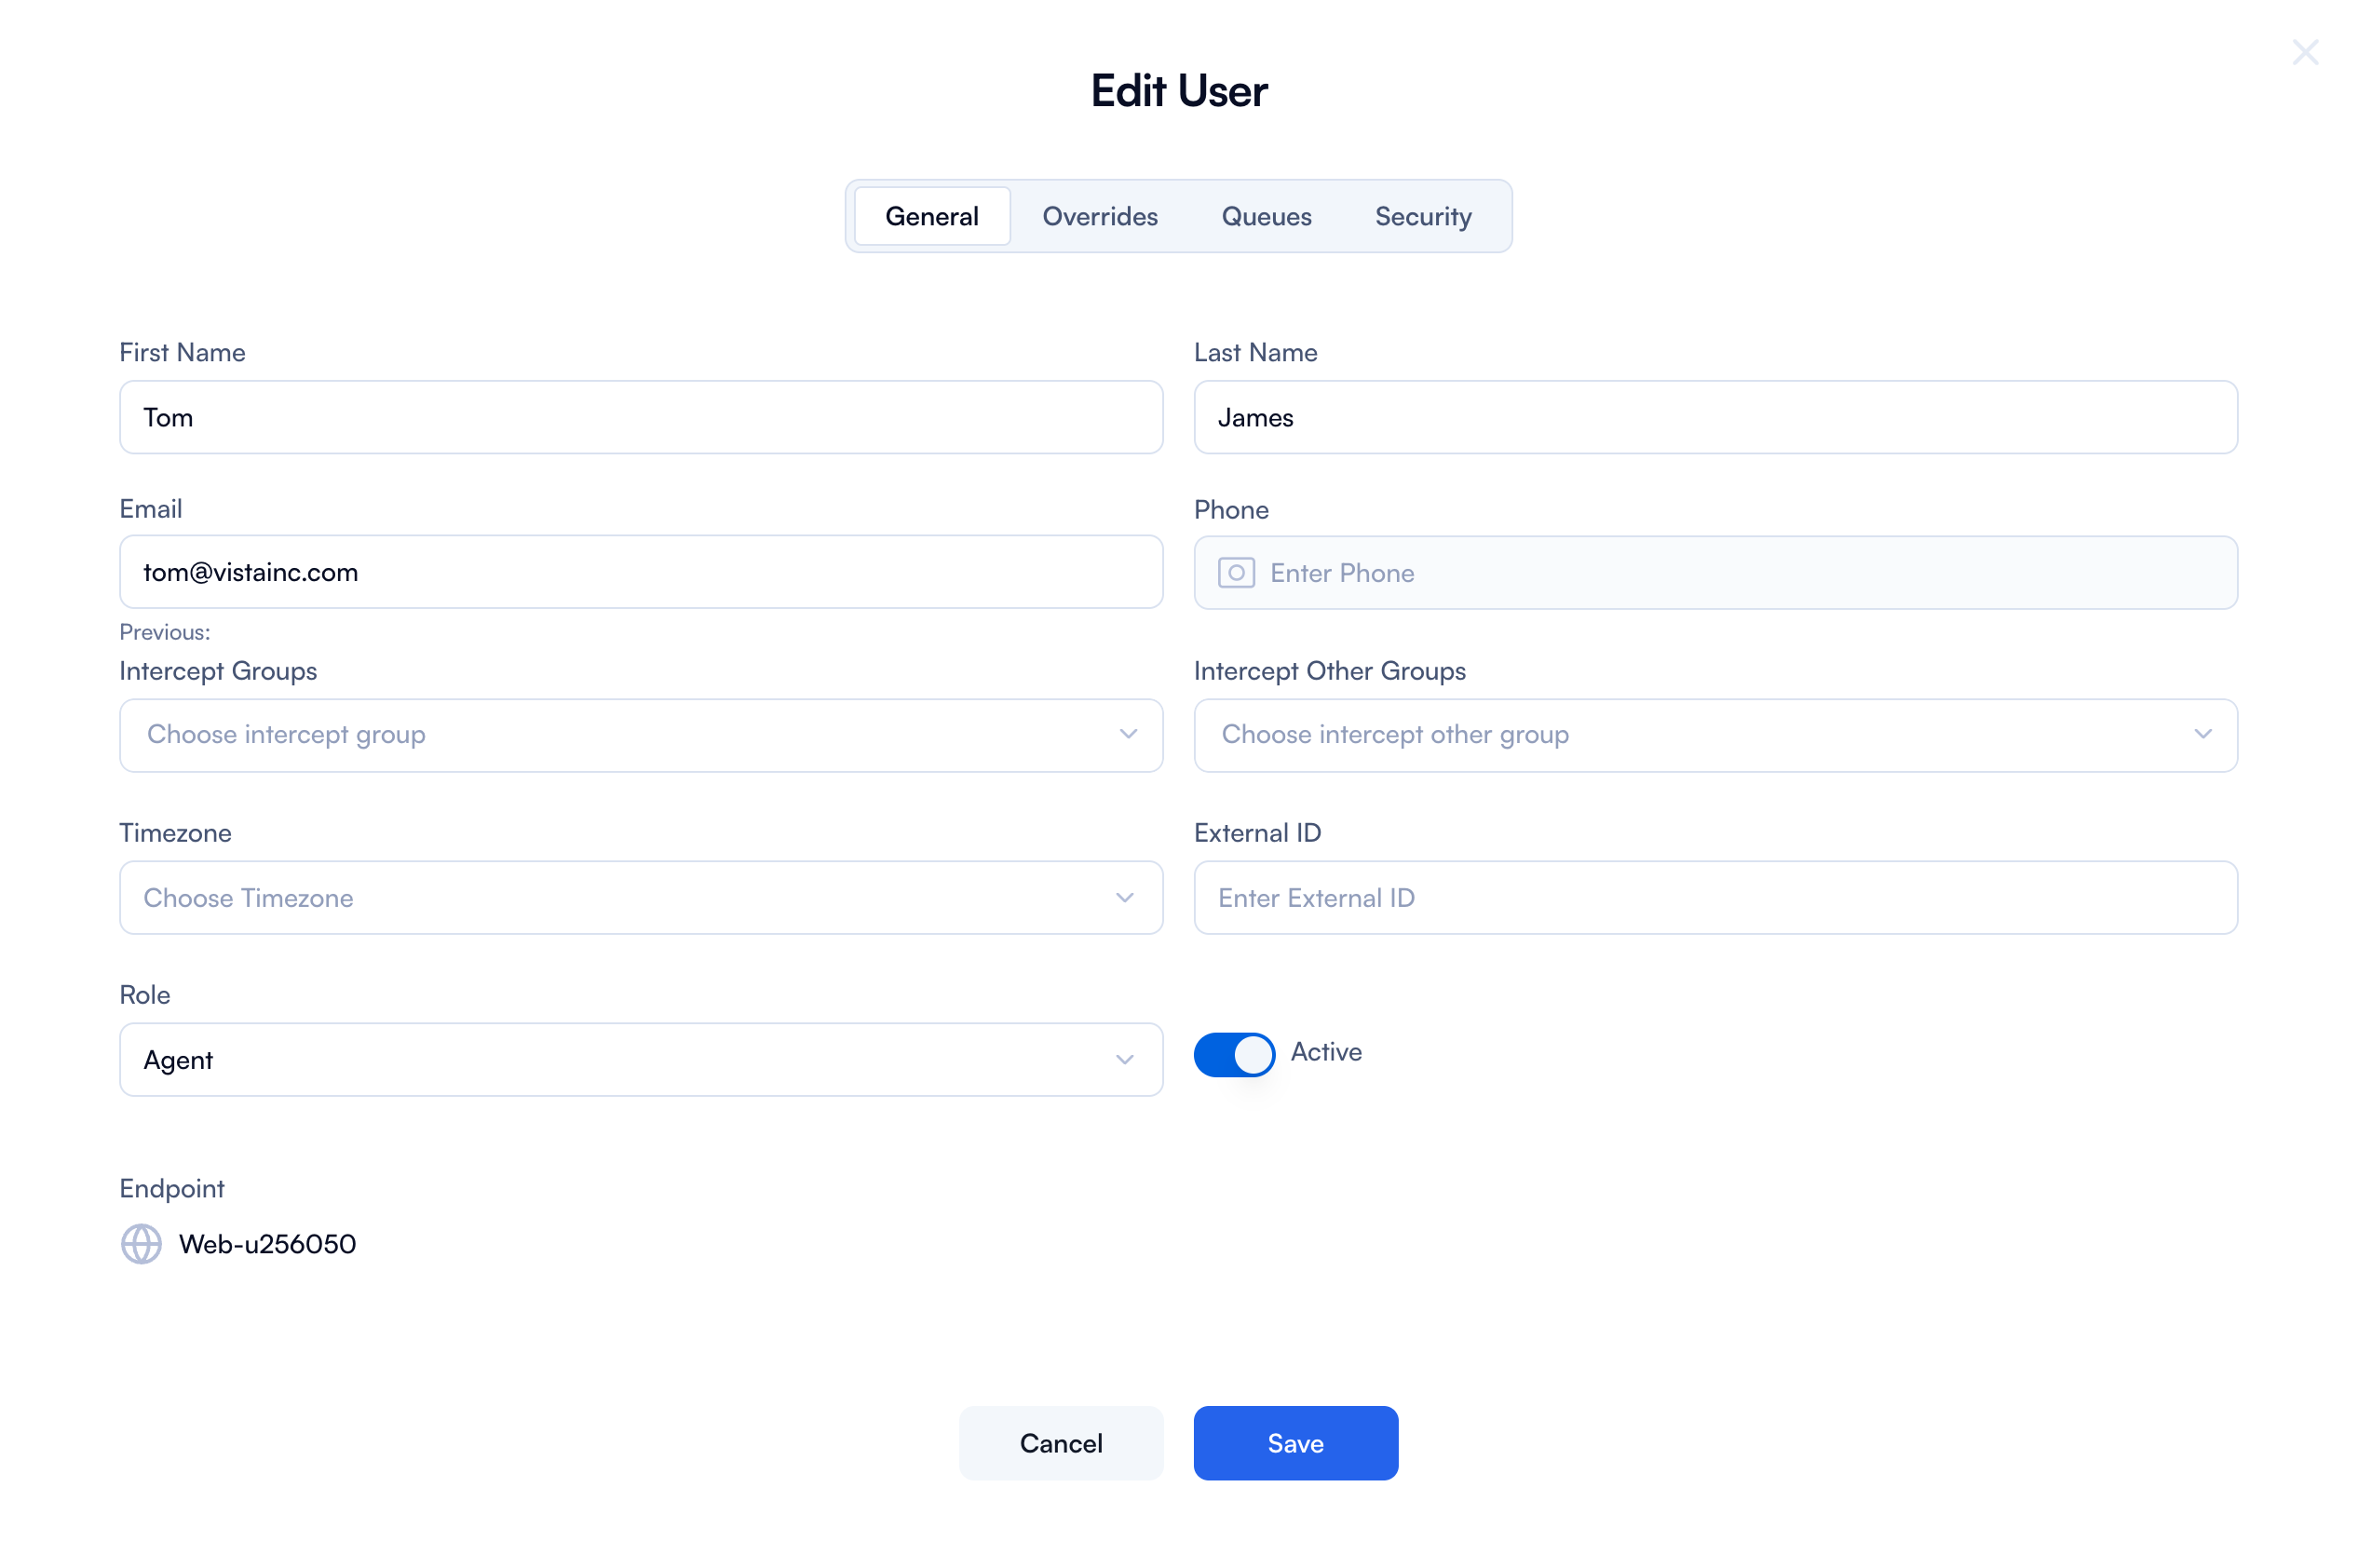
Edit Role in the General tab
| Type | How to use it |
|---|---|
| First name and Last name | Click on the field and edit the first or last name of the user. |
| On this field, you can edit the email address. If the status shows ''Pending'' it means that the user didn't accept the invitation yet. | |
| Phone | Simply click on the field and update the phone number. |
| Intercept Groups and Intercept Other Group | Chose from the dropdown menu the intercept groups you want your user to be assigned to. You can read more about Intercept Groups . |
| Timezones | Choose from the dropdown menu the corresponding time zone. |
| External ID | Edit or add an username. |
| Role | Under ''Role'', you will see the current role under which the user operates and change it by choosing another one from the dropdown menu. |
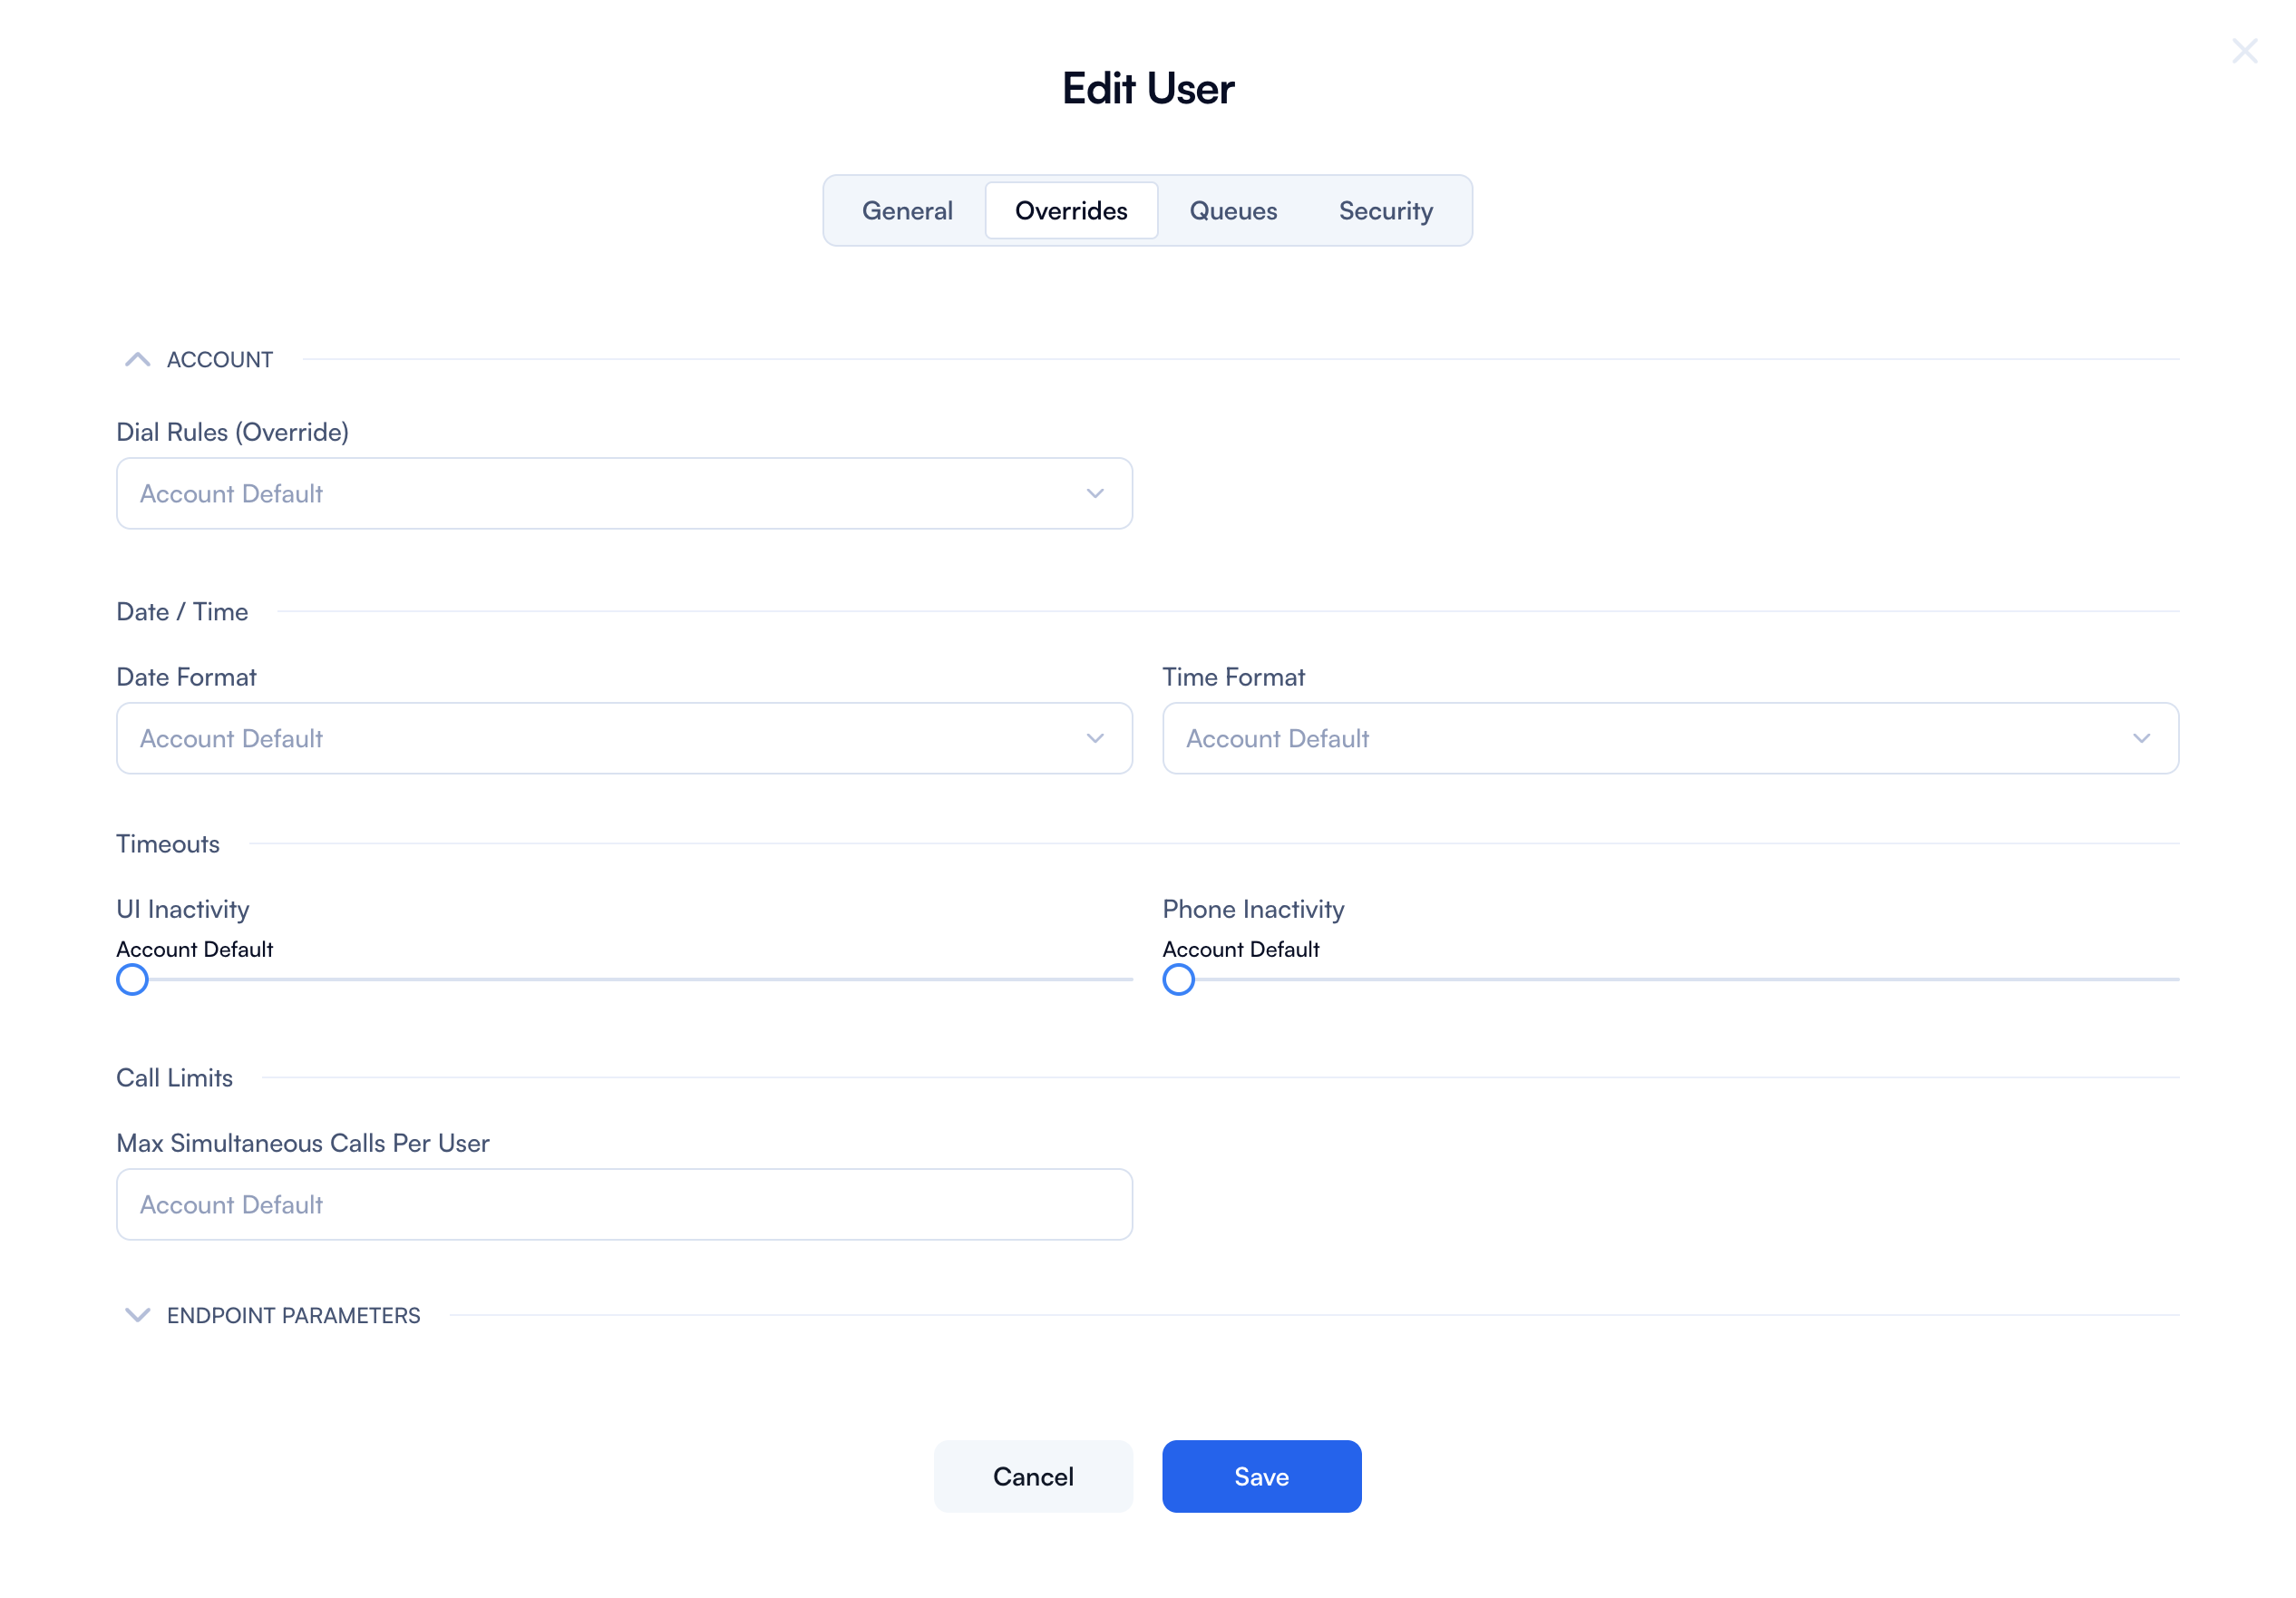
Edit Overrides tab for Agent role
Account sub-section
| Type | Explanation |
|---|---|
| Dial Rules (Override) | This setting allows you to override the default dial rules for this user. |
| Date Format | Choose what is the suitable date format for that user. You can choose between MM/DD/YYYY or DD/MM/YYYY or YYYY/MM/DD. |
| Time Format | You can also choose the time format suitable for that user. You can choose between 12 or 24 hours. |
| UI Inactivity | Adjust the time before the user's interface logs out or becomes inactive due to inactivity. Drag the slider to the time you want or leave it to account default. |
| Phone Inactivity | Set the time after which the phone interface becomes inactive if there's no activity. Drag the slider to the time you want or leave it to account default. |
| Max Simultaneous Calls Per User | Type in the maximum number of concurrent calls that this user can handle. |
If you choose to override the endpoint parameters, you will have the following tabs appear:
- Caller ID
- Queues
- Timeout
- Security
Endpoint parameters sub-section

By enabling this toggle, you can override the endpoint parameters for this specific user. If you choose to proceed, a new form will open with the changes you need to make.

| Type | Explanation |
|---|---|
| BLF Extension | Busy Lamp Field (BLF) extension setting allows specifying the extension to monitor the status of other extensions (e.g., whether they are busy or available). |
| Music On Hold | This setting allows you to choose the music that will be played to callers when they are placed on hold. |
| Allow Calls Waiting | This toggle allows enabling or disabling call waiting for the user. When enabled, the user can receive multiple calls simultaneously, with the second call being placed on hold until the first call is completed. |
| Record Calls | This setting allows you to specify whether calls should be recorded. Options are Yes, No, or Default (following the account-wide setting). |
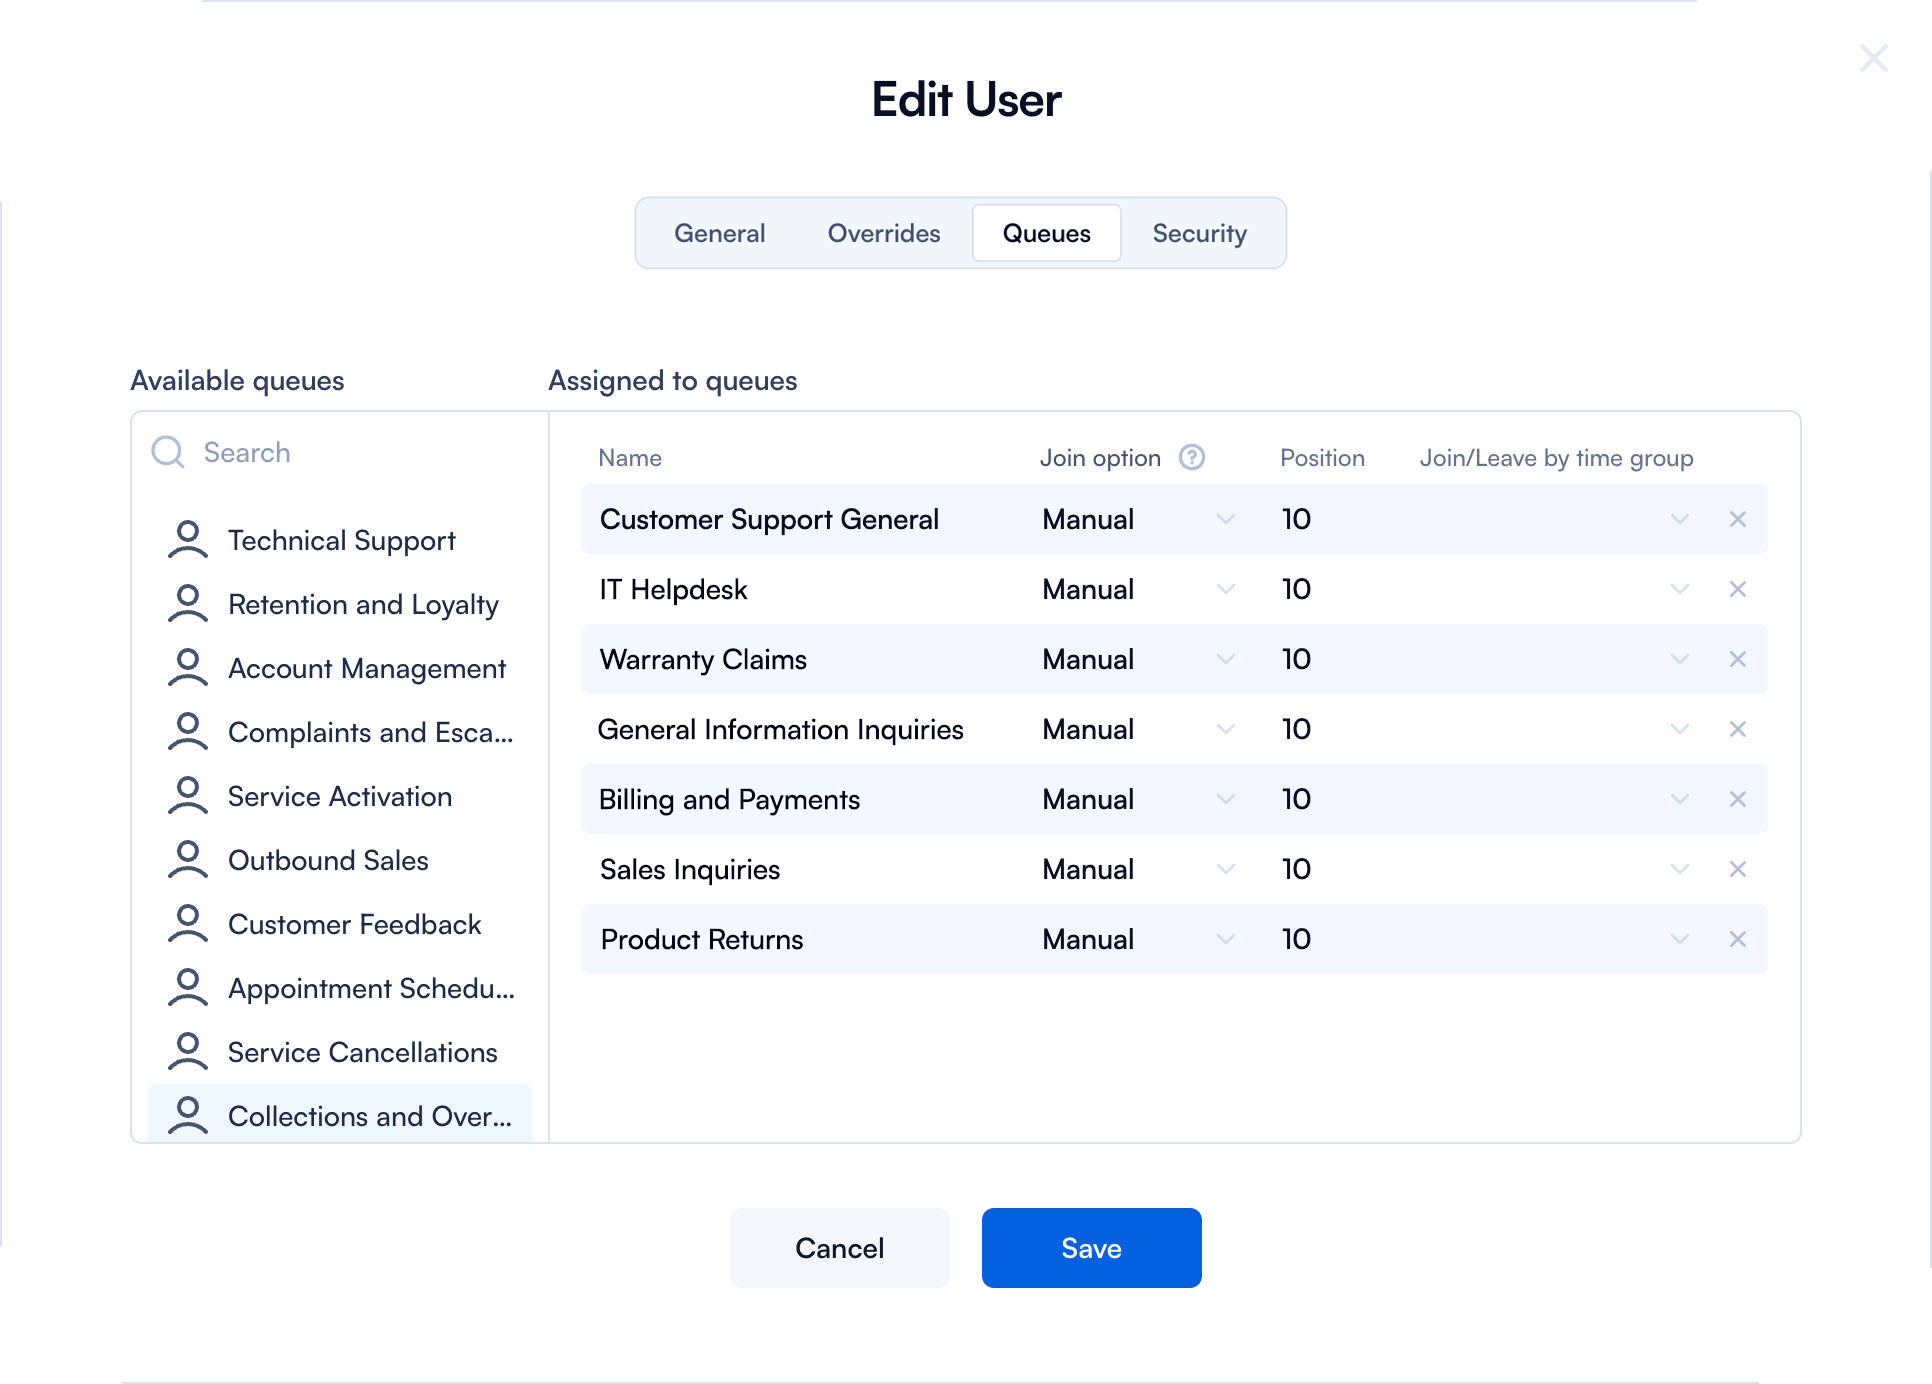
Queues
| Type | Explanation |
|---|---|
| Available queues | This section lists all the available call queues that the user can be assigned to. A queue is a system for managing incoming calls in a specific order until an agent is available to answer them. Read more about Call Queues . |
| Search | This field allows you to search for specific queues within the list of available queues. |
| Assigned to queues | This section lists the queues that the user has been assigned to. |
| Name | This column shows the name of the queues that the user is assigned to. |
| Join option | This setting specifies how the user joins the queue (e.g., automatically or manually). |
| Position | This column indicates the user's position in the queue (if applicable). |
| Join/Leave by time group | This setting allows you to specify if the user should join or leave the queue based on a time group (e.g., working hours). |
Security
| Type | Explanation |
|---|---|
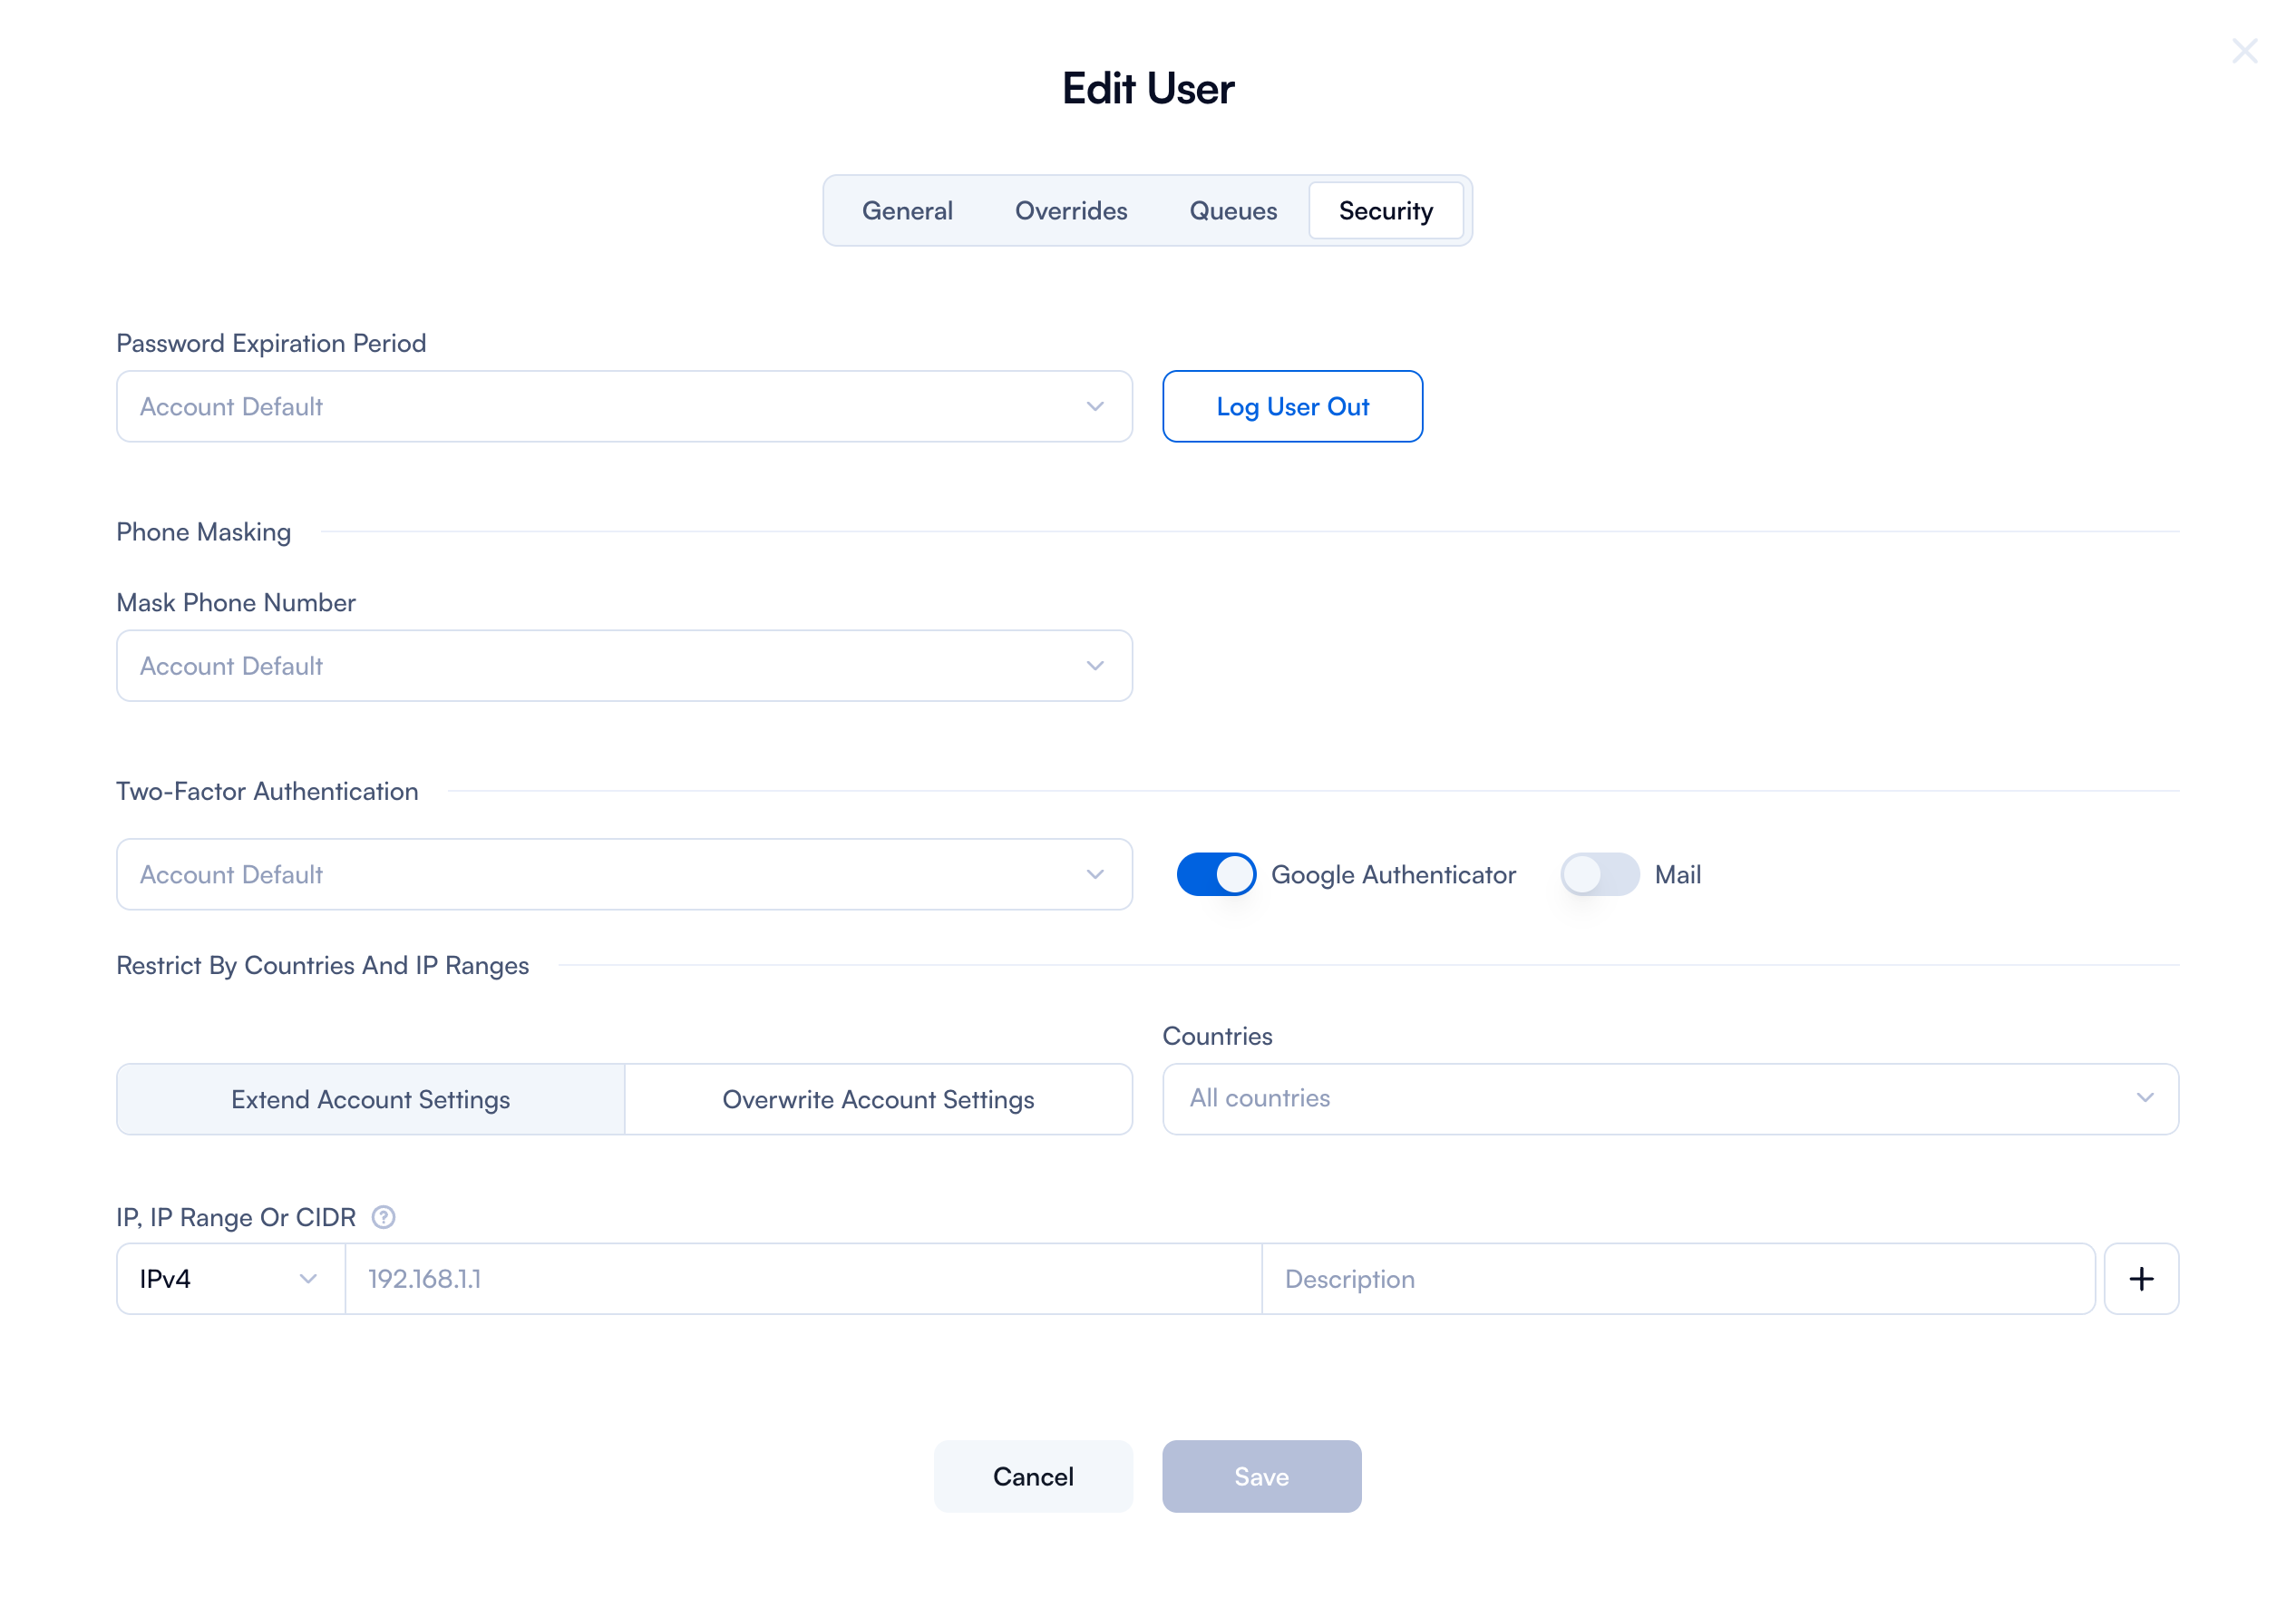
| Password Expiration Period | Choose when the user will have to update the password. You can choose between 1 month up to 12 months. |
| Log Out User Button | Immediately logs the user out from all active sessions. |
| Mask Phone Number | You can choose to mask the phone number during inbound calls and outbound calls. Or you can choose not to mask it or mask for all calls. |
| Log User Out | This button logs the user out of all active sessions. |
| Two-Factor Authentication | You have the following options for 2FA: to enable it, disable it, or enable it only for suspicious logins. You can also choose whether you want your user to use Google Authenticator, email, or both for receiving the code. |
| Extend Account Settings | This button extends the default account settings to include the specified countries and IP ranges. |
| Overwrite Account Settings | This button overrides the default account settings with the specified countries and IP ranges. |
| Countries | This dropdown allows you to select specific countries from which the user is allowed or restricted access. |
| IPv4, Range Or CIDR | This field allows you to specify IP addresses or ranges in CIDR notation to restrict access. |
| Choose value | This dropdown allows you to select a value for the IP restriction (e.g., allow or deny). |
| Enter Description | This field allows you to enter a description for the IP restriction. |
| Delete | This button deletes the specified IP restriction from the list. |
| Add (+) | This button adds the specified IP restriction to the list. |
What happens if you want to resend the invite to a user or reset password?
All you need to do is go to the 3 dots near the pencil icon and you will see the two options.
User Roles
Admin role

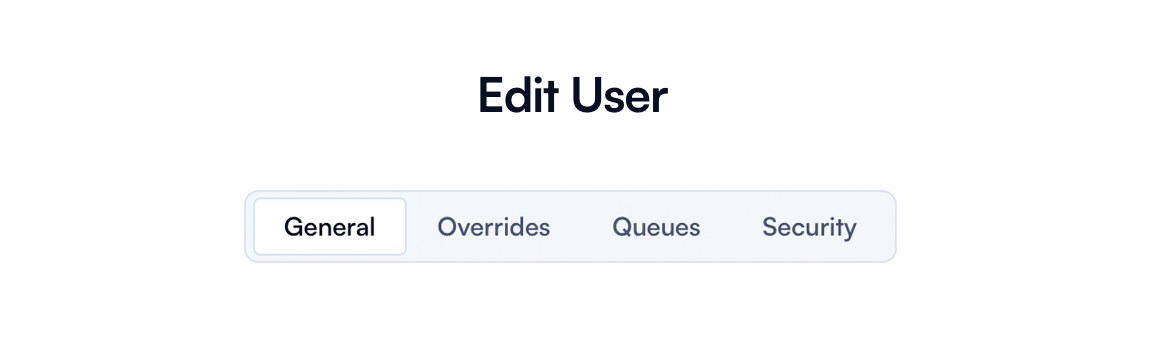
If you want to edit a user that has an admin role, you will have only 4 tabs to update:
- General
- Overrides
- Timeout
- Security
The same forms as the one for the agent role will open, and you can use the information above to update it.
Supervisor role

If you want to edit a user that has an Supervisor role you will have only 4 tabs to update:
- General
- Overrides
- Timeout
- Security
The same forms as those for the Agent role will open, and you can use the information above to update them.
Financial role
If you want to edit a user that has a financial role, you will have only 4 tabs to update:
- General
- Overrides
- Timeout
- Security
The same forms as those for the Agent role will open, and you can use the information above to update them.
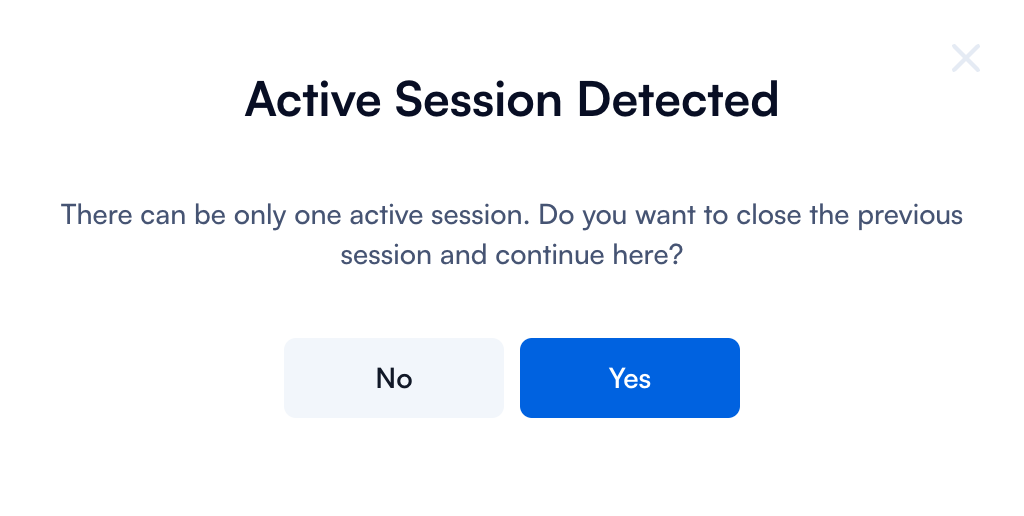
P.S: We have a 1-session policy in place
One important thing to note is that in PBX.IM, only one active session is allowed per user account at a time. If someone else is logged in with your username while you attempt to start a new session, you will receive the following notification.