Agent Status
''Agent Status'' is a PBX.IM feature allows administrators to configure and manage the availability status of agents within the system. This page enables the creation of different status types for agents, which can help identify their current activity or availability, such as being "On a Break," "Attending Calls," "Offline," or other custom statuses.
Table of Contents
Introduction to Agent Status
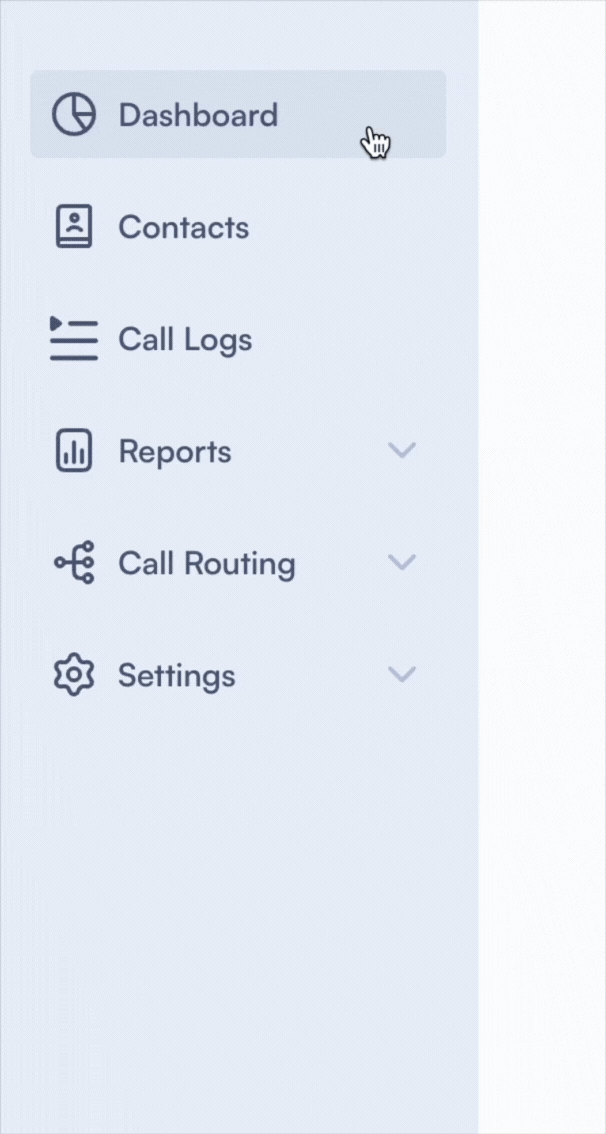
Access Agent Status
- Log in to PBX.IM
- Go to Settings
- Click on General
Set up an Agent status
Once you click on the ''Agent status'' section, a page will open where you can see an overview.
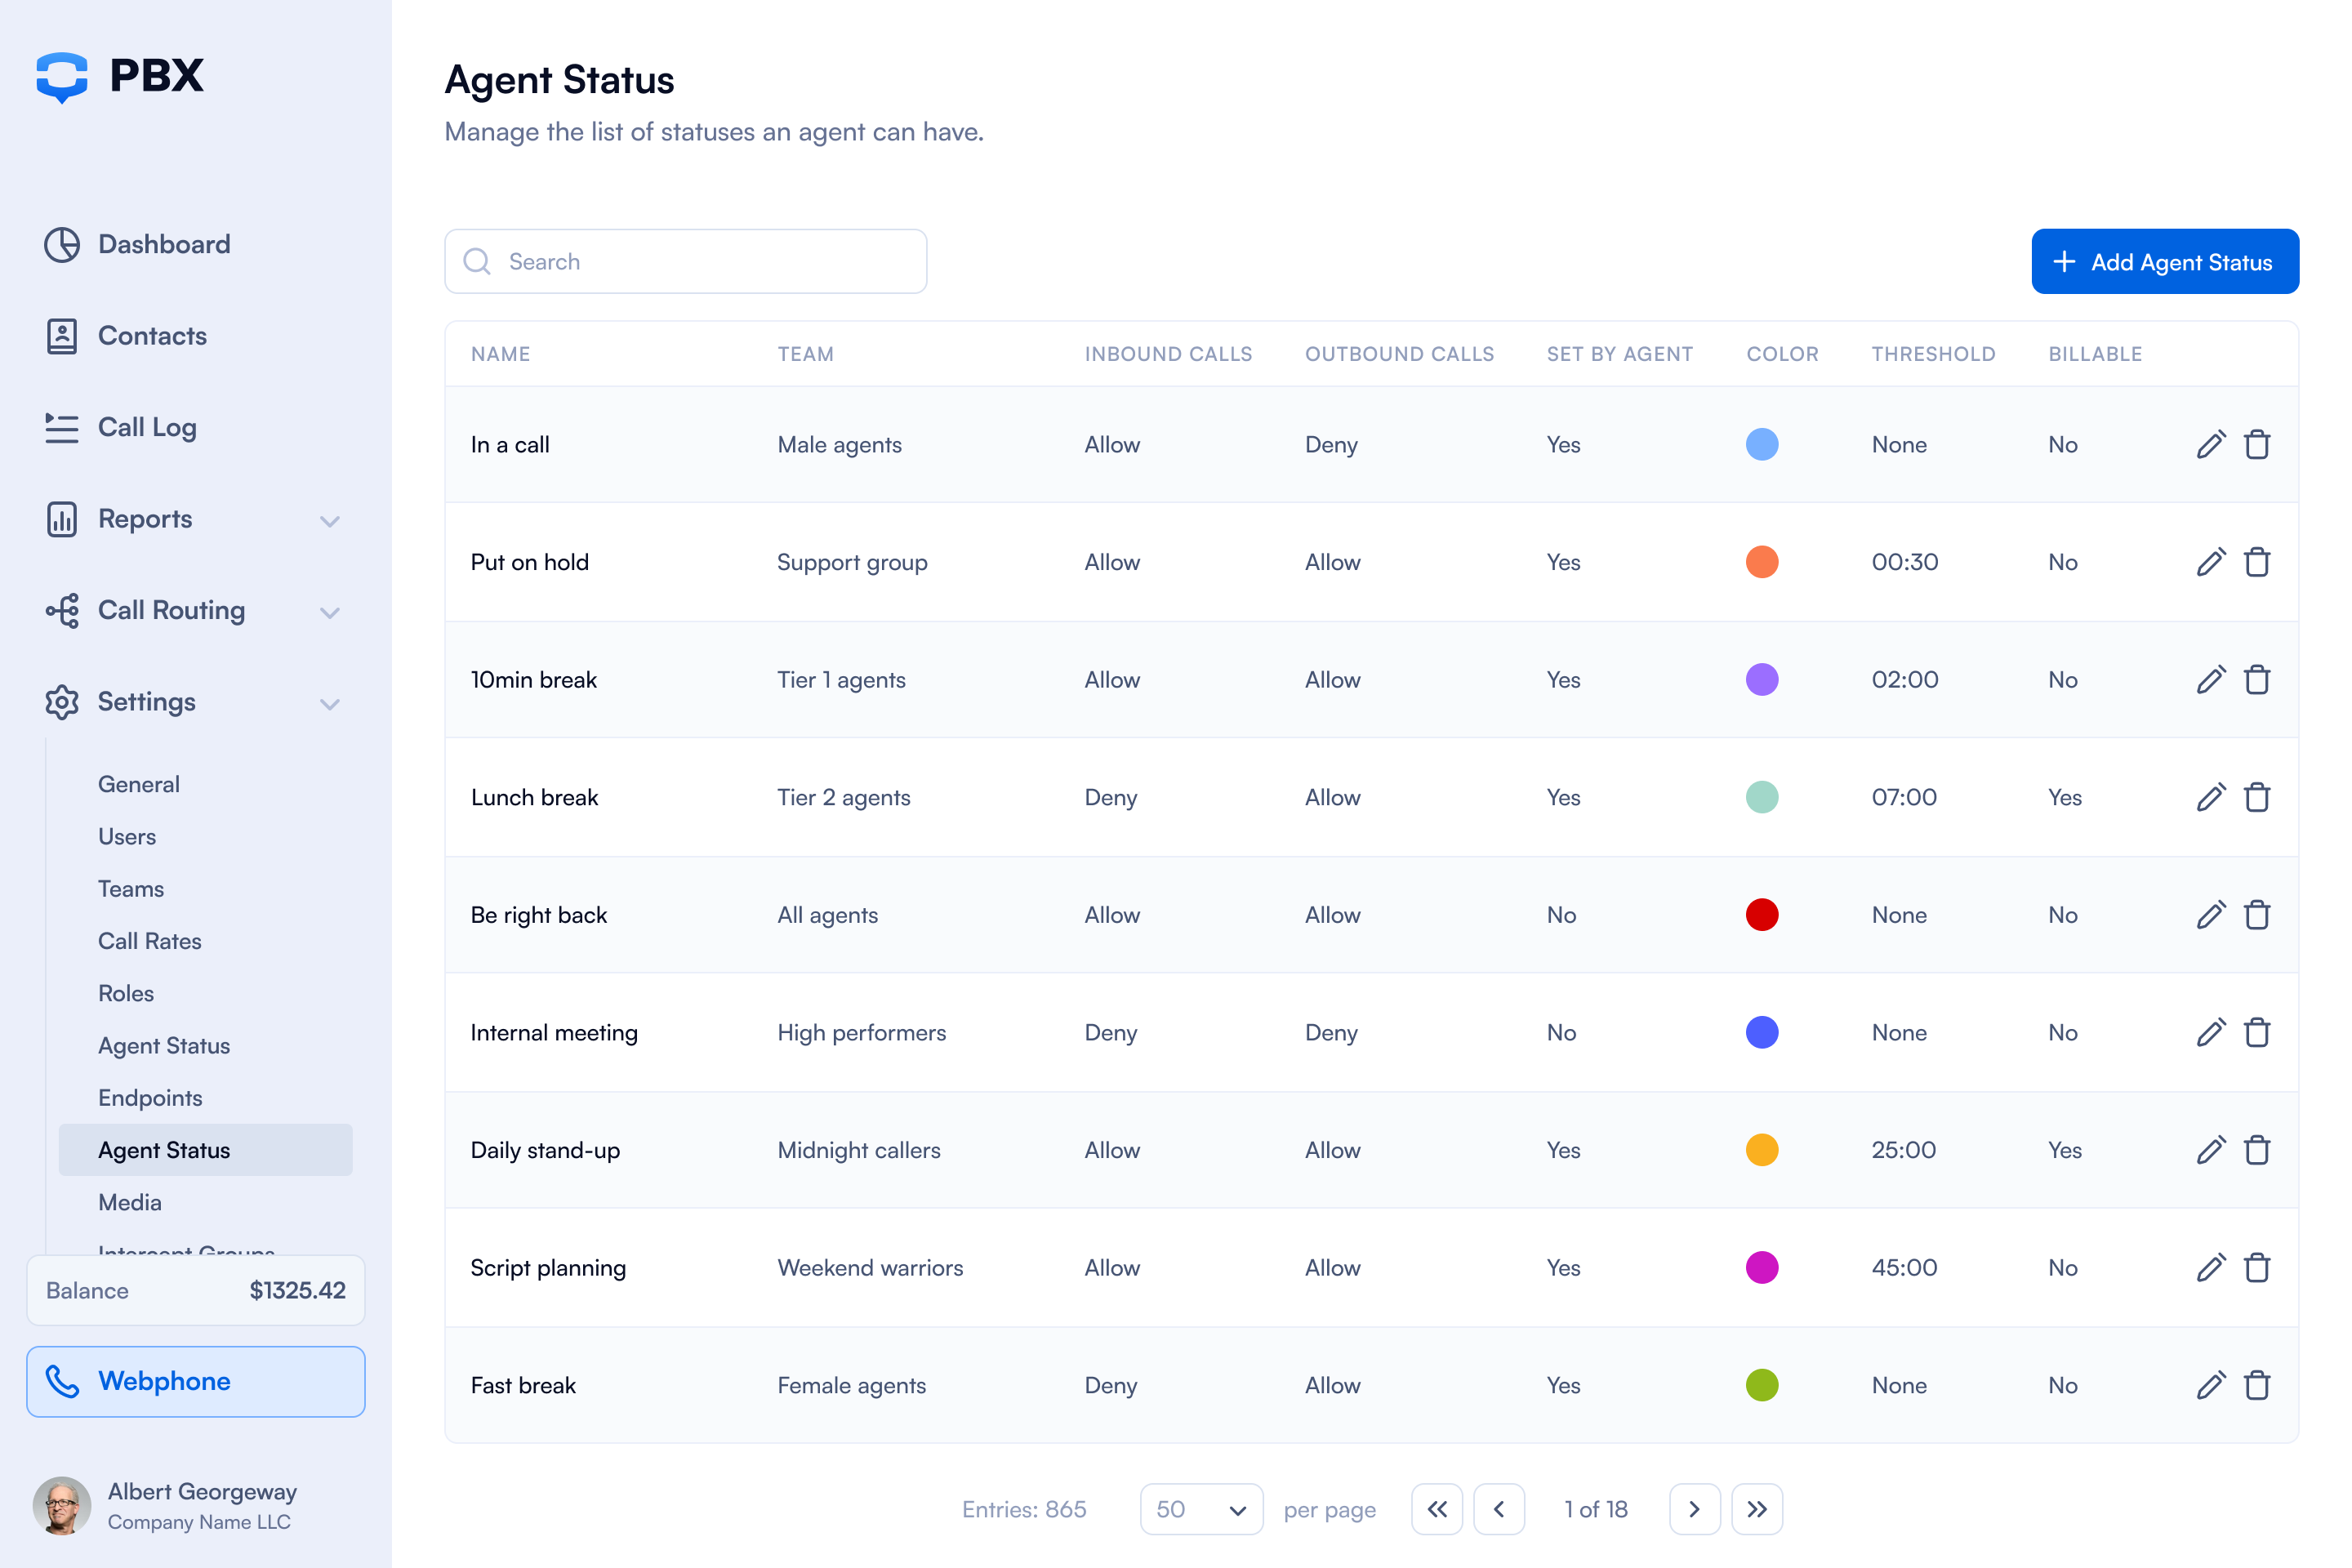
To add a new Agent status all you have to do is to click on ''Add Agent Status'' in the upper right corner.

Once you click on it, a form will open up where you need to fill in the details:
Add Agent Status
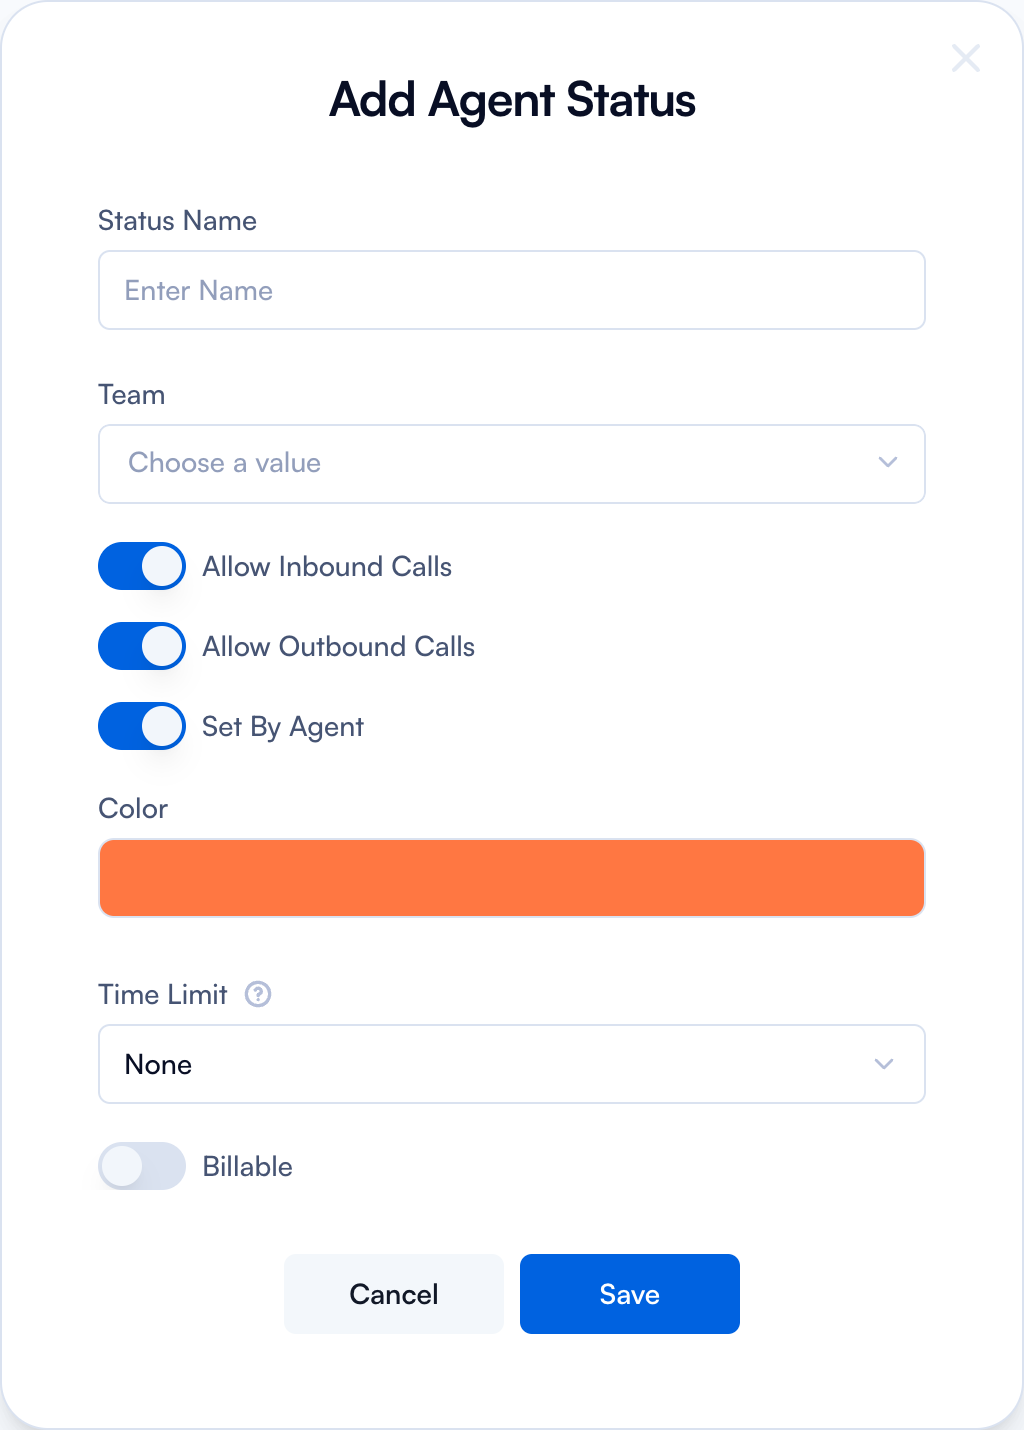
| Field | How to use |
|---|---|
| Status Name | Write the name for the agent status. For example, you can add: Lunch break, Daily stand up etc. The statuses added here will be available for use in Settings. Check on Teams page for more details. |
| Team | Select the username associated with the specific status from the dropdown menu. |
| Allow Inbound Calls | Toggle on or off to allow or disallow inbound calls. |
| Allow Outbound Calls | Toggle on or off to allow or disallow outbound calls. |
| Set by Agent | Toggle on or off to allow the agent to set this status. |
| Color | Choose a color for this status. |
| Time limit | Set a time limit for this status from the dropdown menu. If the agent exceeds the time limit, you as the admin will be notified, and the agent's status will be colored red. |
| Billable Toggle | Select whether this status is billable or non-billable. |
Edit an Agent Status

If you want to edit an Agent Status, simply go to the main page and click on the ✏️ icon. The same form will pop up, allowing you to make any necessary changes.
Note: It’s not necessary to add users for each status. You can simply add the name of the status and toggle on the 'Set by Agent' option to allow your agents to set it.