Buy PBX.IM Phone Numbers
Table of Contents
- How do phone numbers work?
- Access the Phone Numbers page
- Buy a phone number
- Edit a phone number
- How to Port Your Numbers to PBX.IM
How do phone numbers work?
Phone numbers or DID (Direct Inward Dialing) numbers are assigned to your PBX.IM account and allow calls to be directed to specific phones within your organization without the need for an operator or manual intervention. In PBX.IM, you can purchase as many phone numbers as you need.
Please note that cost of these numbers is not included in the Payment plans , however, when you set up your account, one phone number is automatically included for free.
Access the Phone Numbers page
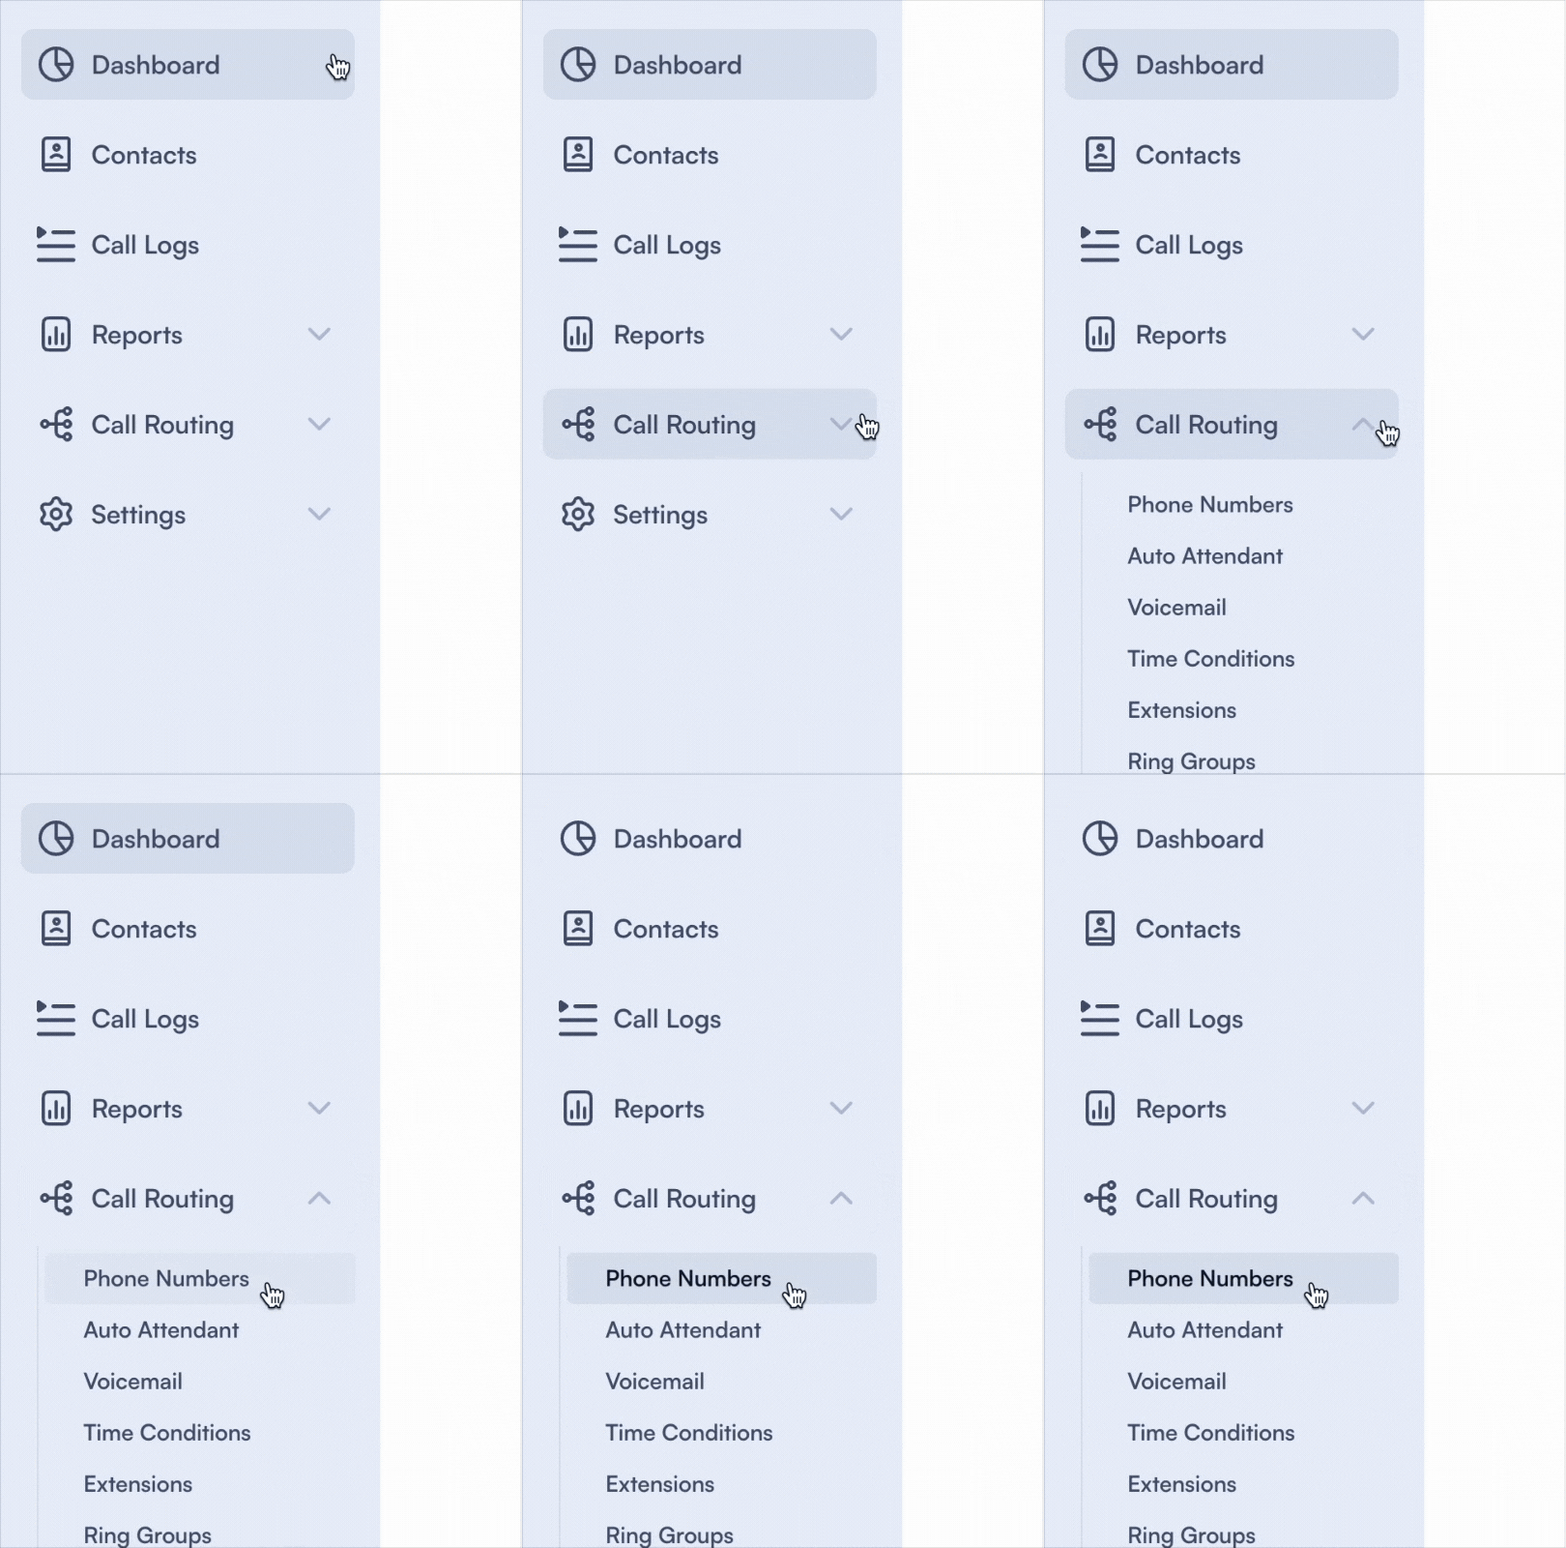
- Log in to PBX.IM and go to Call Routing
- Click on the dropdown menu and select Phone Numbers
Buy a phone number
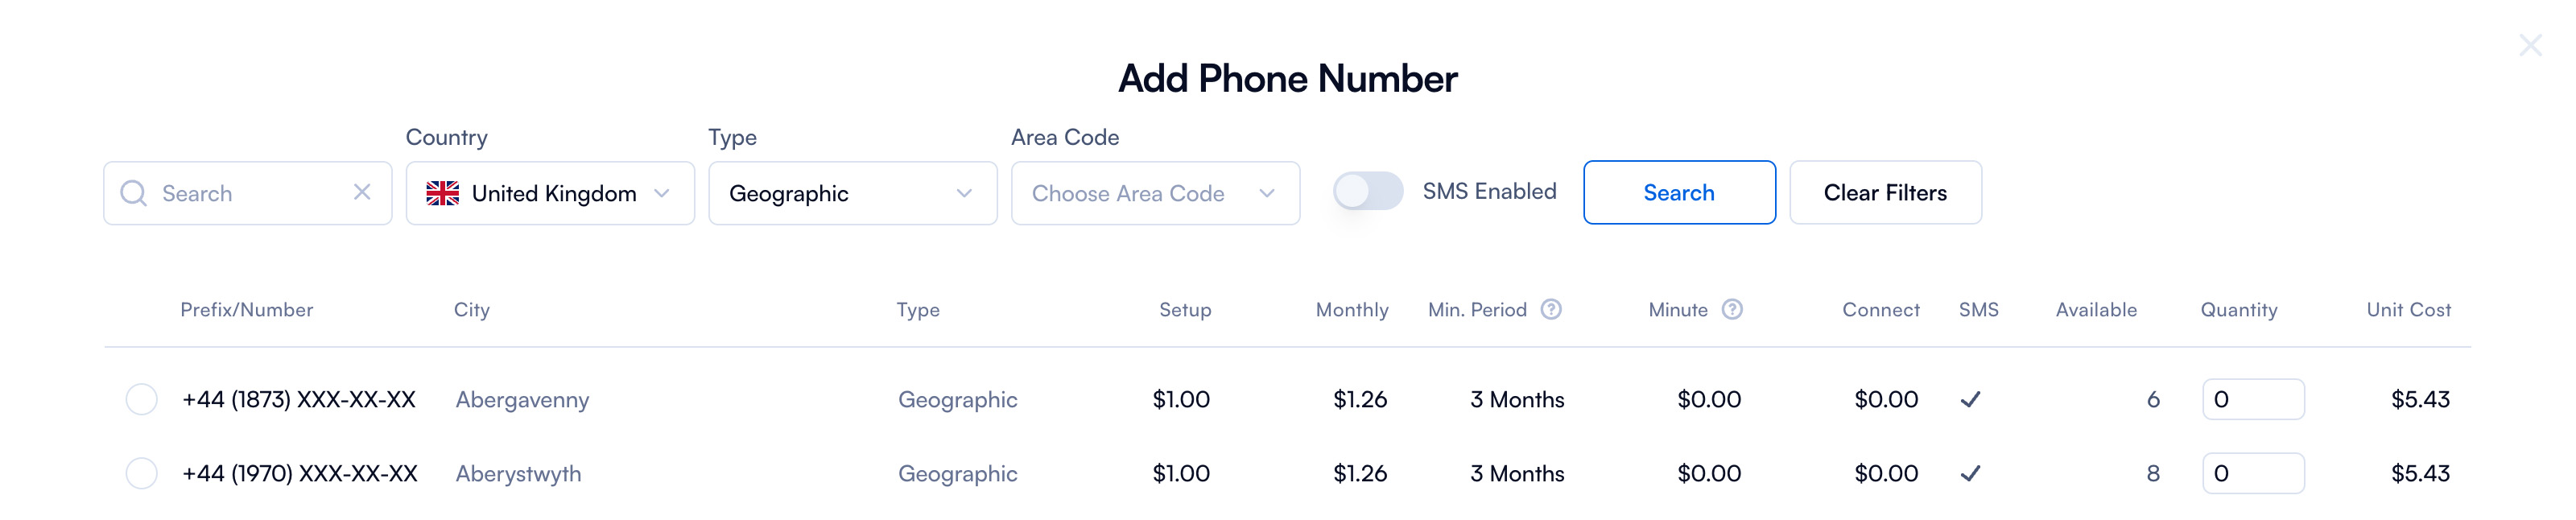
If you want to purchase a new phone number, click on "Add Number" and a pop-up will appear.
Before proceeding further with purchasing a phone number, make sure you have a valid payment method. If you need assistance, you can read more in this section: Manage Your Account & Billing
| Type | How to use it |
|---|---|
| Country | Select the country for which you want to purchase the phone number. |
| State | After selecting the country, you can choose a specific state within that country for the phone number. |
| Type | You can choose the type of phone number: Geographic (tied to a specific location), National (not tied to any location within a country), Mobile (associated with mobile phone services), or Toll Free (callers are not charged, typically with 800/888 prefixes). |
| Area code | This allows you to choose a specific area or city code for a geographic number. |
| SMS Enabled Toggle | This switch allows you to enable or disable SMS capabilities for the phone number. |
After completing all the fields above, simply click "Search," and PBX.IM will return the phone numbers that meet your criteria.
Once you click on ''Search,'' you will see all the phone numbers under the following columns:

| Field | Explanation |
|---|---|
| Prefix/Number | The prefix or area code of the phone number, represented as "+1 (XXX) XXX-XX-XX", where XXX indicates the specific area code and local number range. |
| City | The city associated with the specific geographic phone number. |
| Type | The type of phone number, which in our case is "Geographic", meaning it is tied to a specific location. |
| Setup | The one-time setup fee for activating the phone number. |
| Monthly | The recurring monthly cost to maintain the phone number. Each number, from our example, costs $1.26 per month. |
| Min. Period | The period represents the minimum time you must pay for and keep the number active. |
| Minute | This field shows the per-minute charge for incoming or outgoing calls. |
| Connect | The connection fee for each call made using this phone number. |
| SMS | Indicates whether SMS (text messaging) is enabled for the phone number. A checkmark (✓) signifies that SMS is available. |
| Available | The number of phone numbers available for that specific city. |
| Quantity | Allows you to select the quantity of phone numbers to purchase for a specific city. In our example, the default is 0.. You can buy up to 10 phone numbers per city. |
| Unit Cost | The cost you will have to pay per unit. |
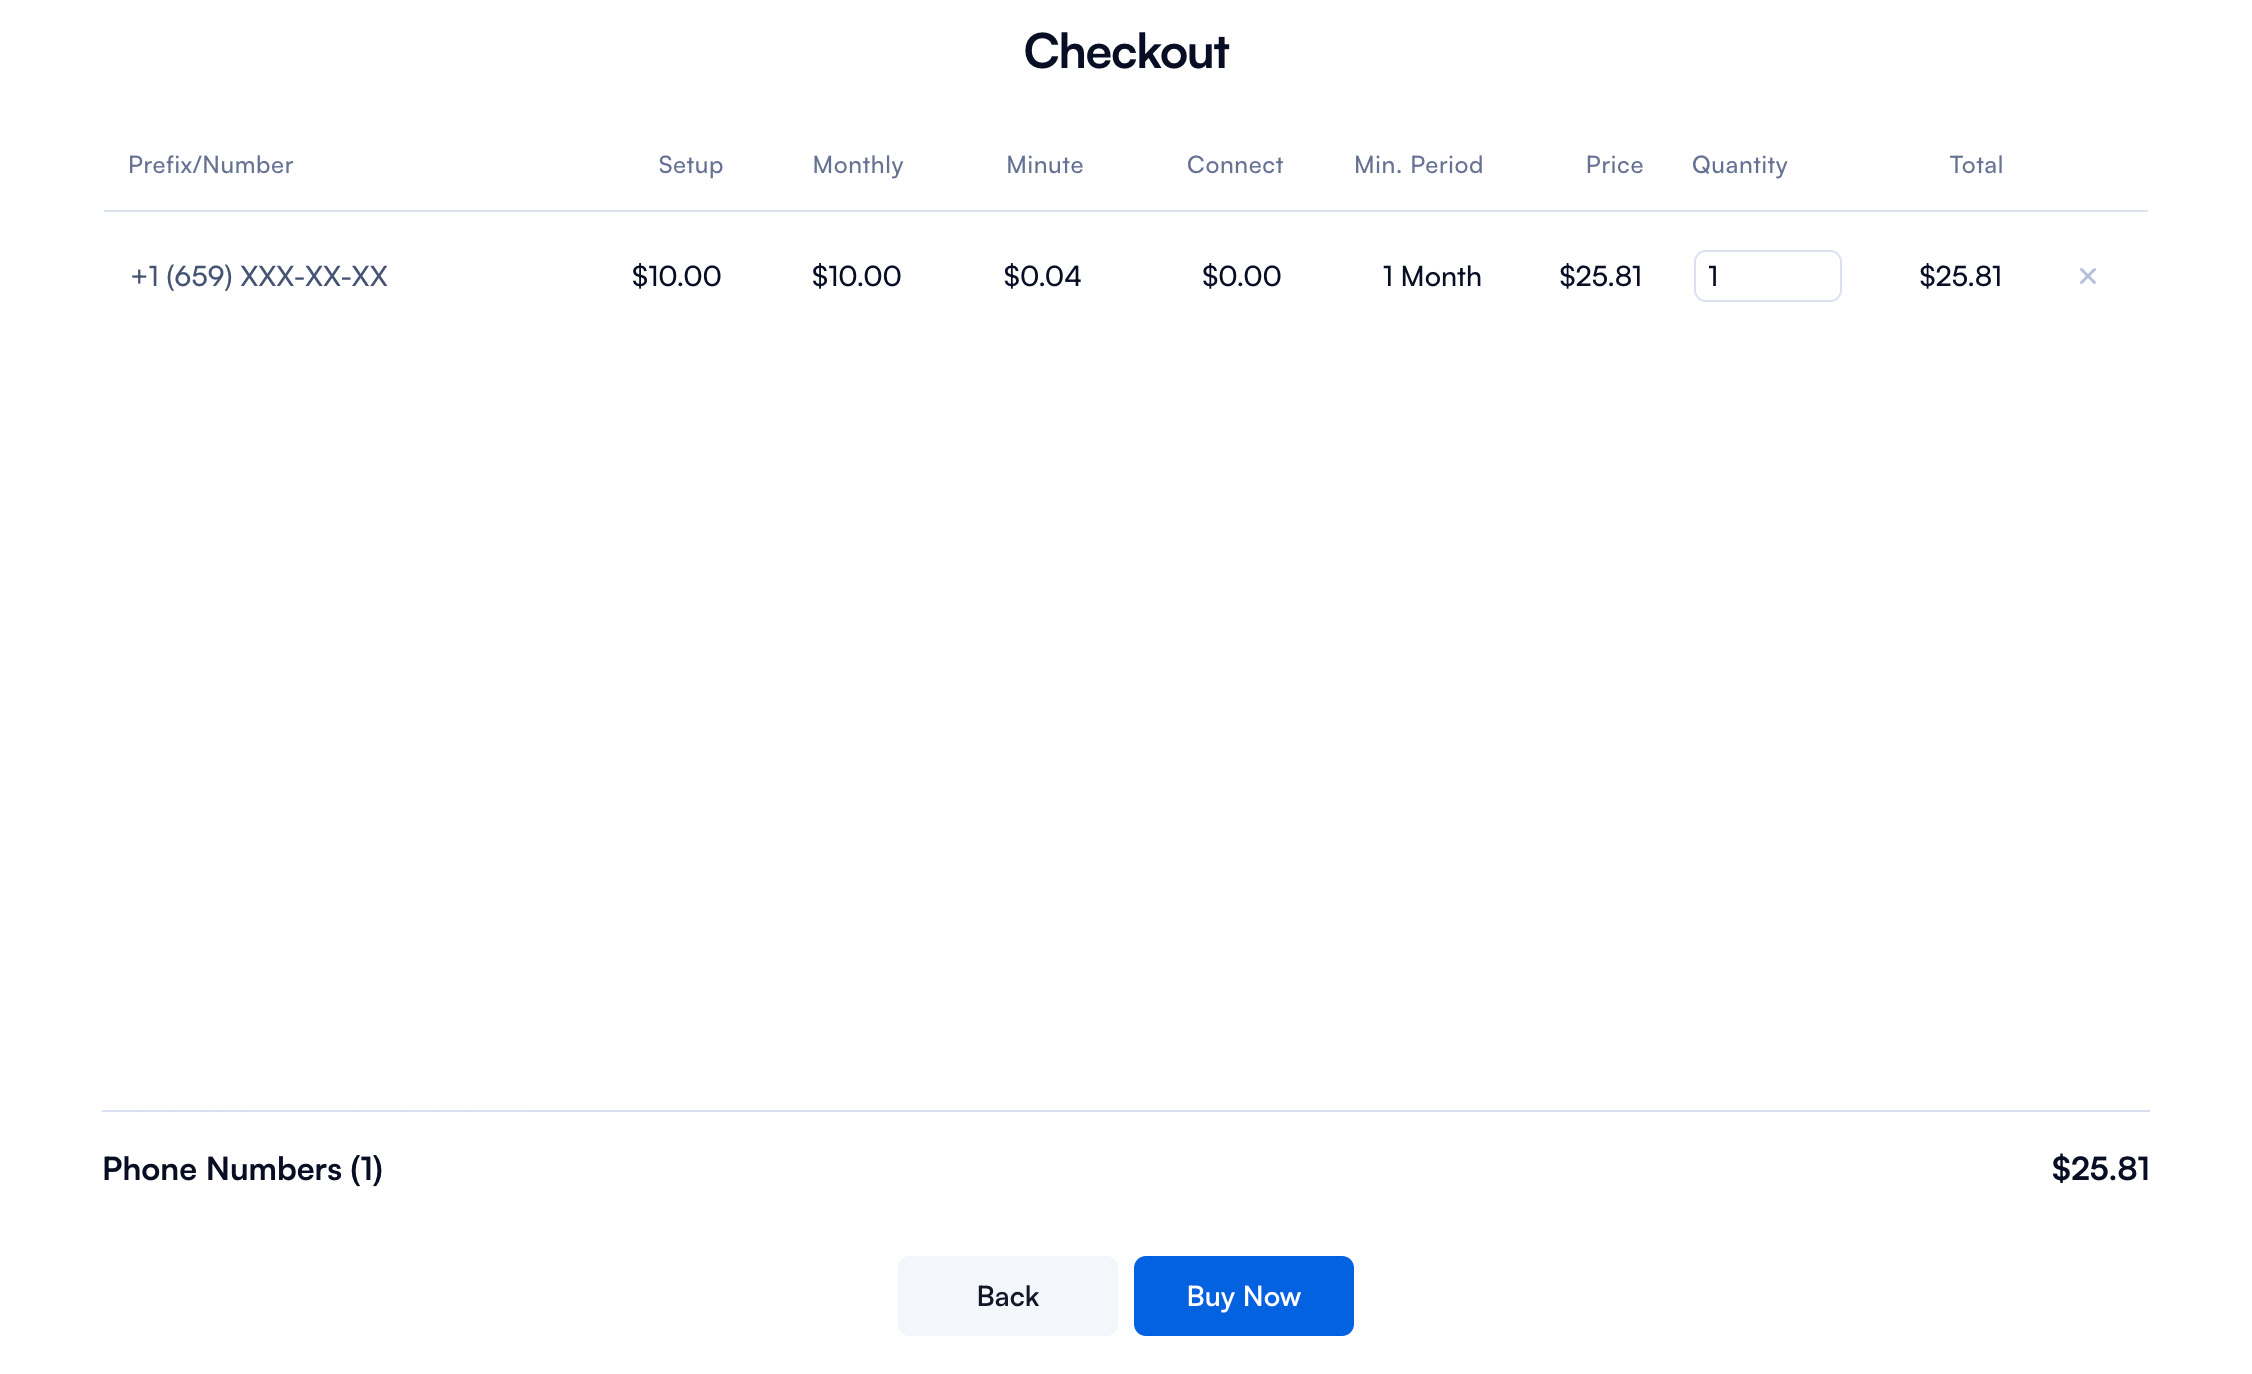
Let's take an example and say we choose to buy the first number. You need to select the number and click on ''Checkout''.

You will see a pop-up displaying the number you selected, the associated costs, and the total amount to be paid. After verifying that this is the purchase you want to make, click "Buy Now."
Checkout
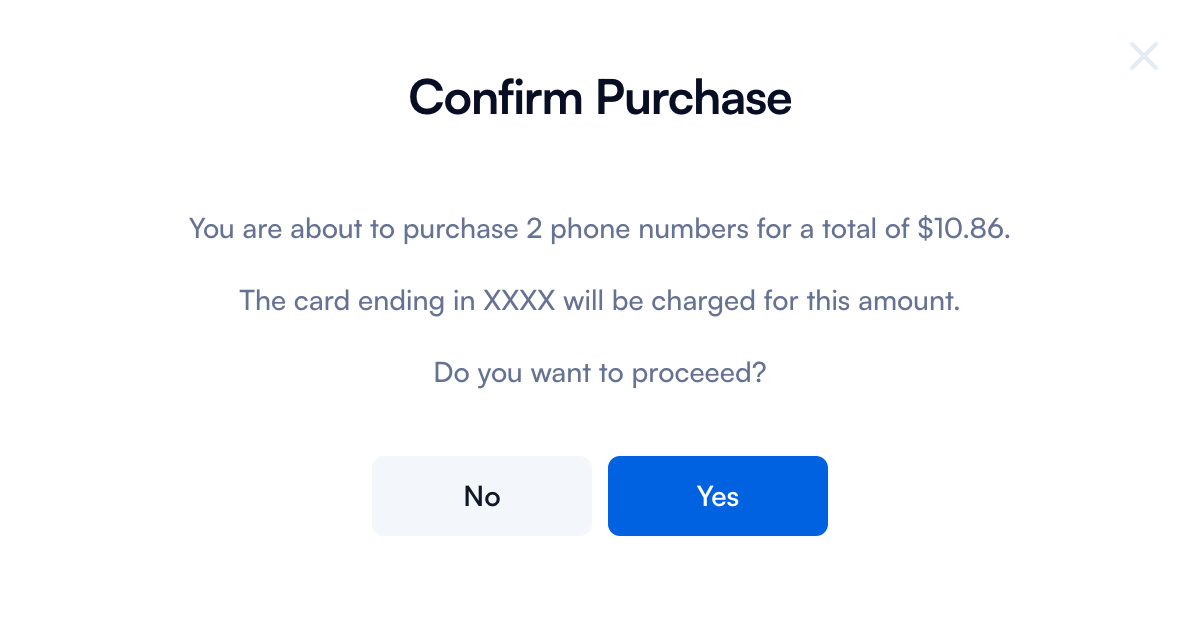
A pop-up will appear, prompting you to confirm your payment and indicating the credit card that will be charged.
Confirm Purchase
If you don't have a card assigned, you will have to add one. The pop-up looks like this:
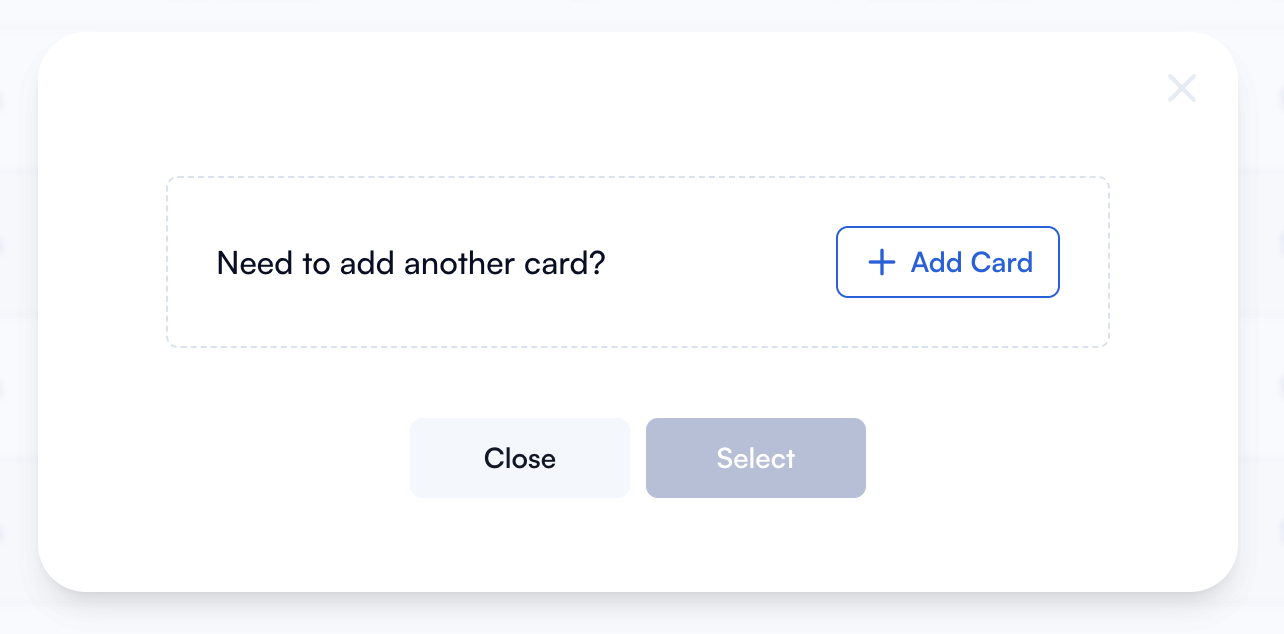
Each purchased phone number comes with 2 channels, allowing it to handle up to two simultaneous calls. If you encounter any issues, please contact us at [email protected] .
Edit a phone number
If you want to edit a phone number you previously purchased, return to the main page, where you can see a list of all the numbers you’ve purchased.
The path is: Log in to PBX.IM → Call Routing → Phone Numbers. Select the number you want to edit and click on ✏️ .

Once you click on it, a form will open up:
Edit Phone Number
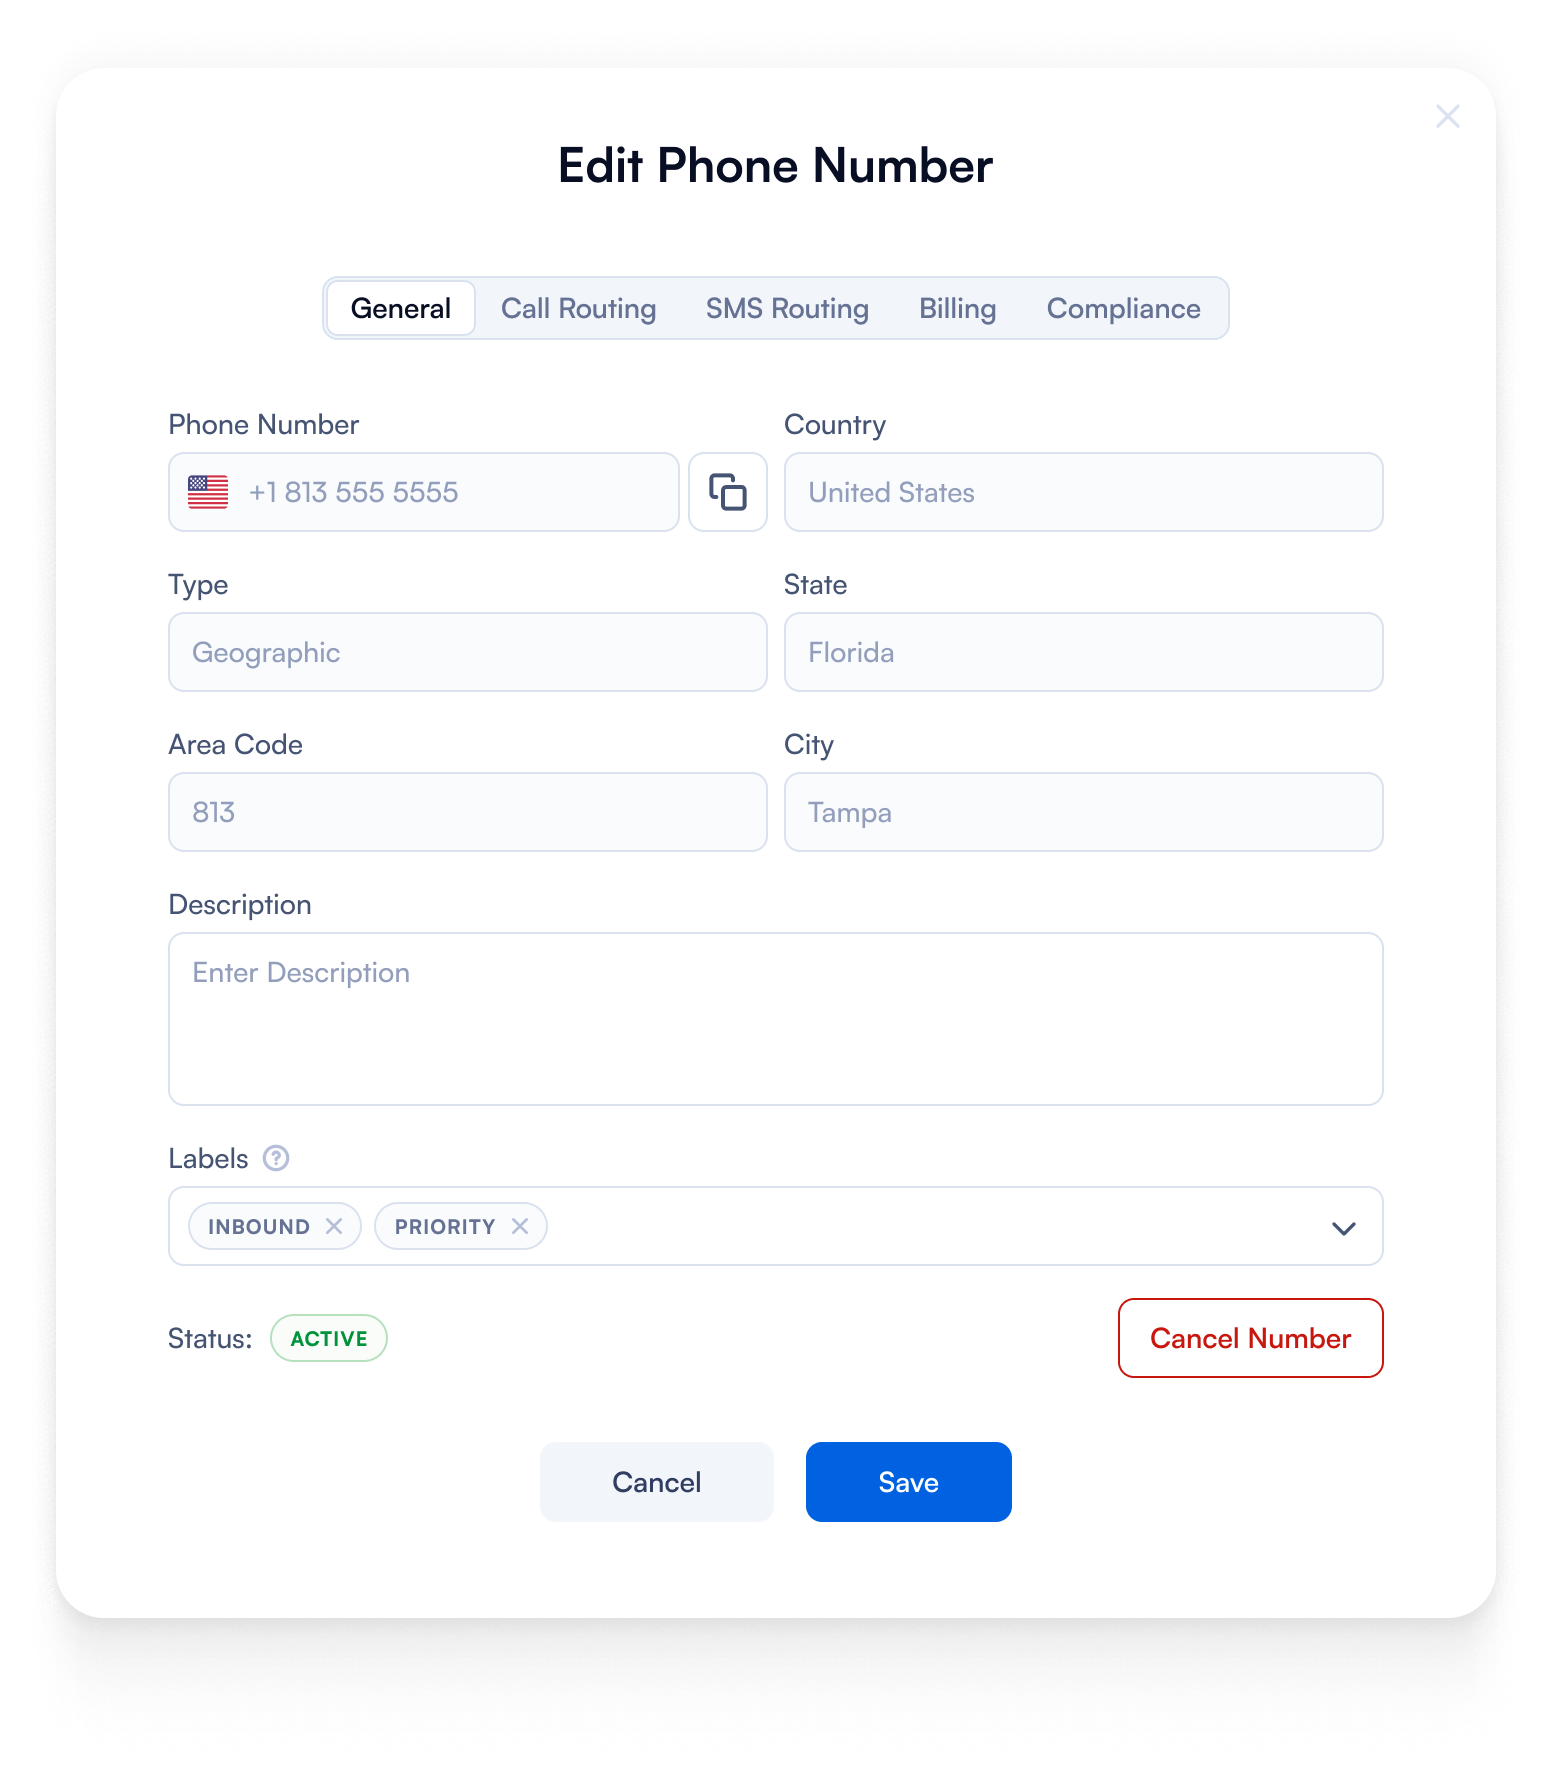
In the modal, you will see 5 tabs where you can make changes:
- General
- Call Routing
- SMS Routing
- Billing
- Compliance
General
The general tab displays basic information about the phone number.
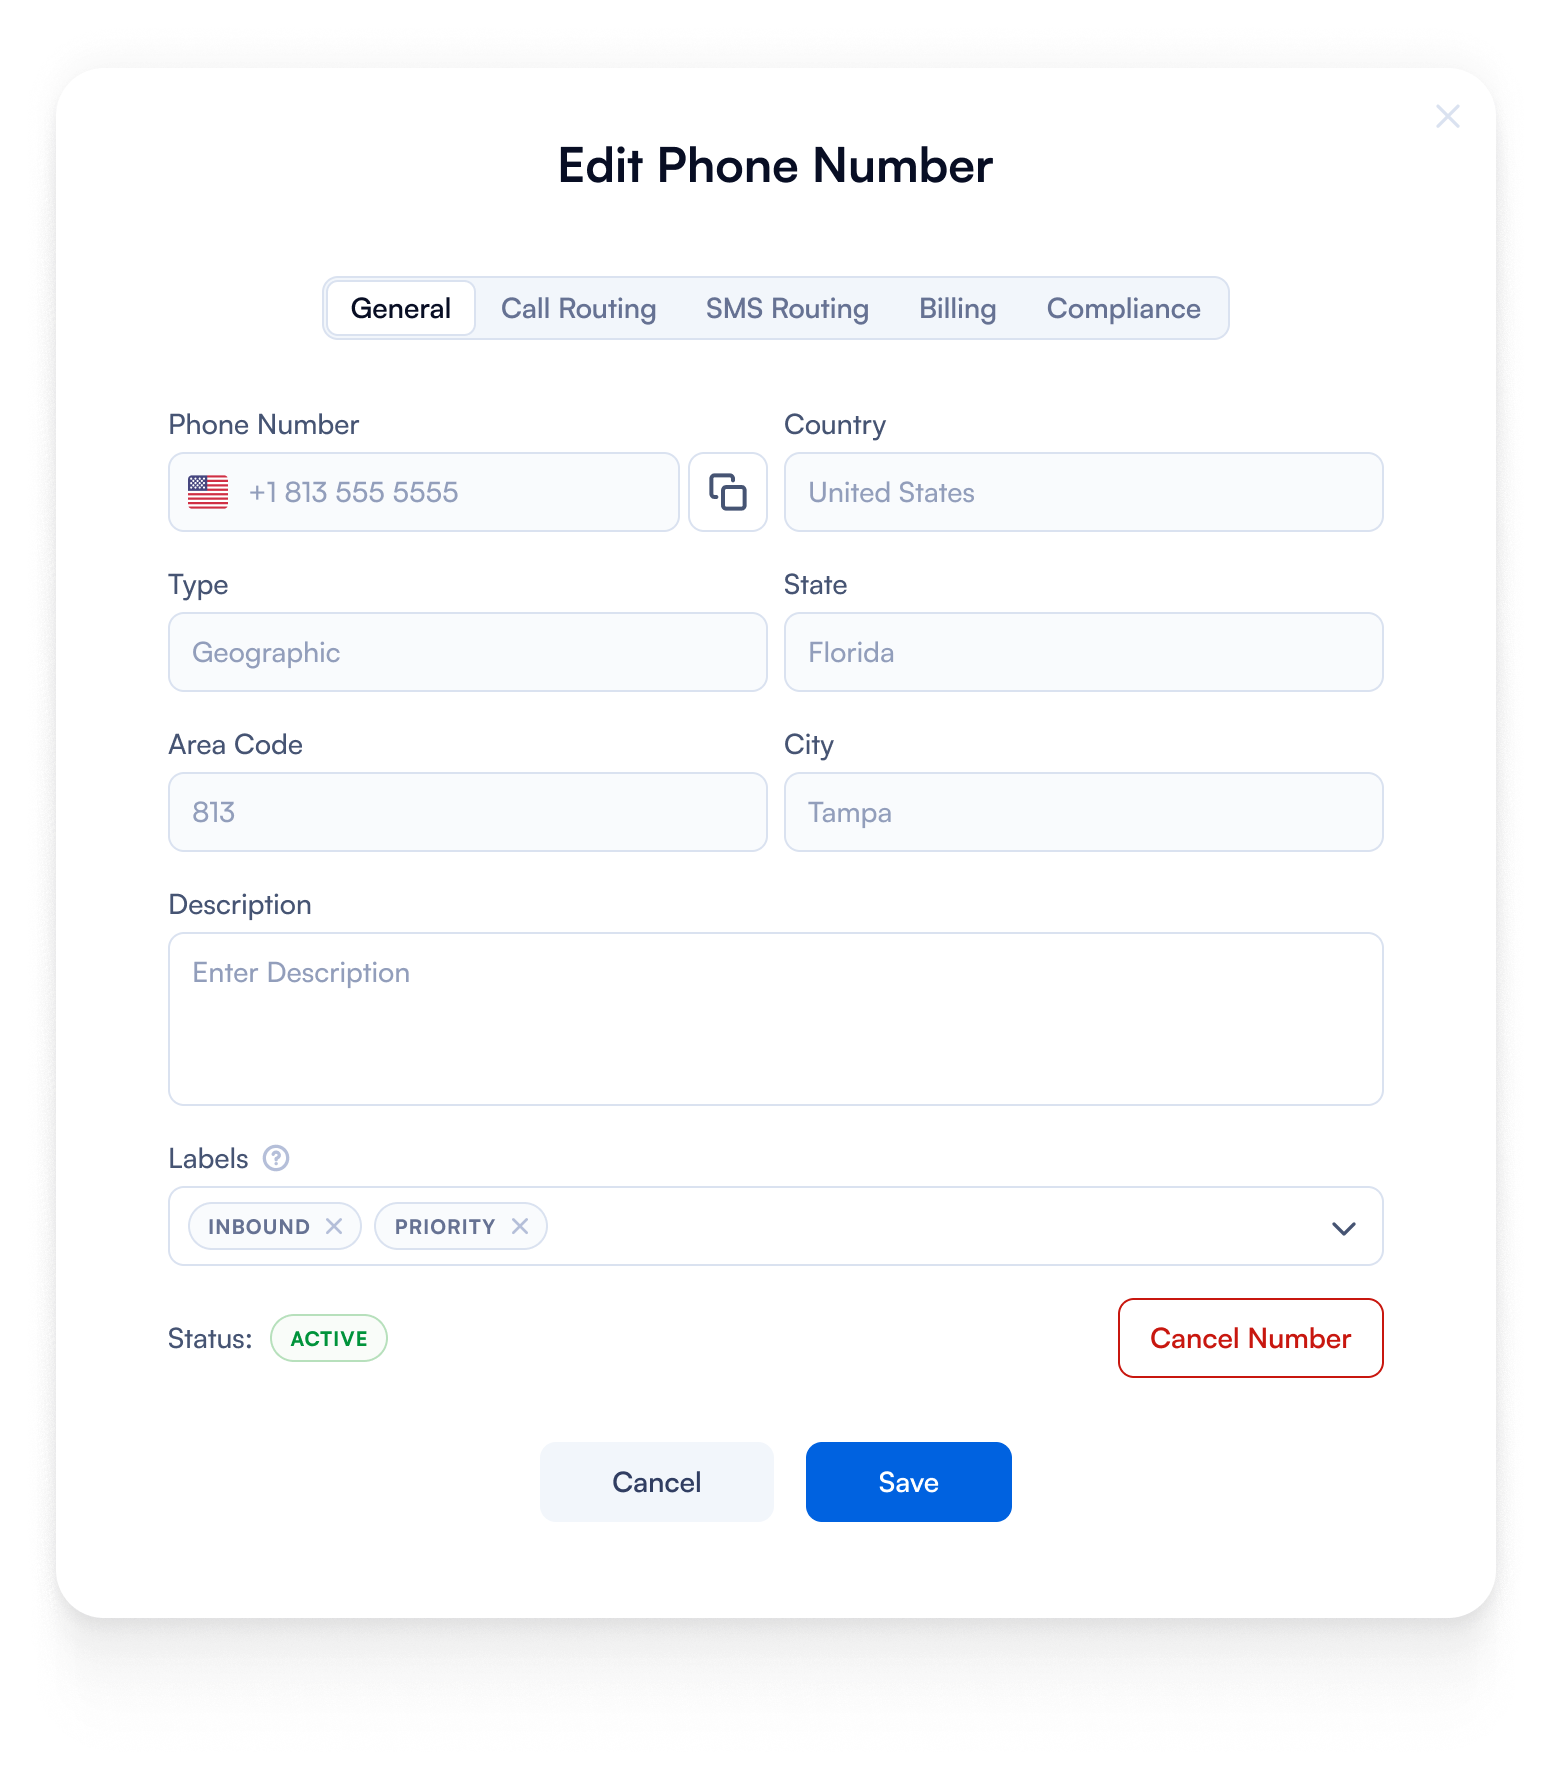
| Field | Description |
|---|---|
| Phone number | Represents the number you're managing |
| Country | The country where the number is registered. |
| Type | Shows if the number is Geographic, Toll-Free, or Mobile. |
| State | The state associated with the number |
| Area Code and City | The city linked to the area code |
| Description | A place to add notes about what this number is used for. |
| Labels | Tags to help organize or search numbers (e.g., INBOUND, PRIORITY). |
| Status | Shows if the number is Active or not. |
| Cancel Number | Deletes or deactivates this phone number. |
| Cancel / Save buttons | The Cancel button discards changes; the Save button confirms them. |
Call Routing
Configure who should receive calls when there's an inbound call (Destination) and caller ID permissions. This section helps answer questions like:
- How do I set up a phone number?
- How do I set up a caller ID?
- Can I use one number as a caller ID for multiple users?
- Where can I control these settings?
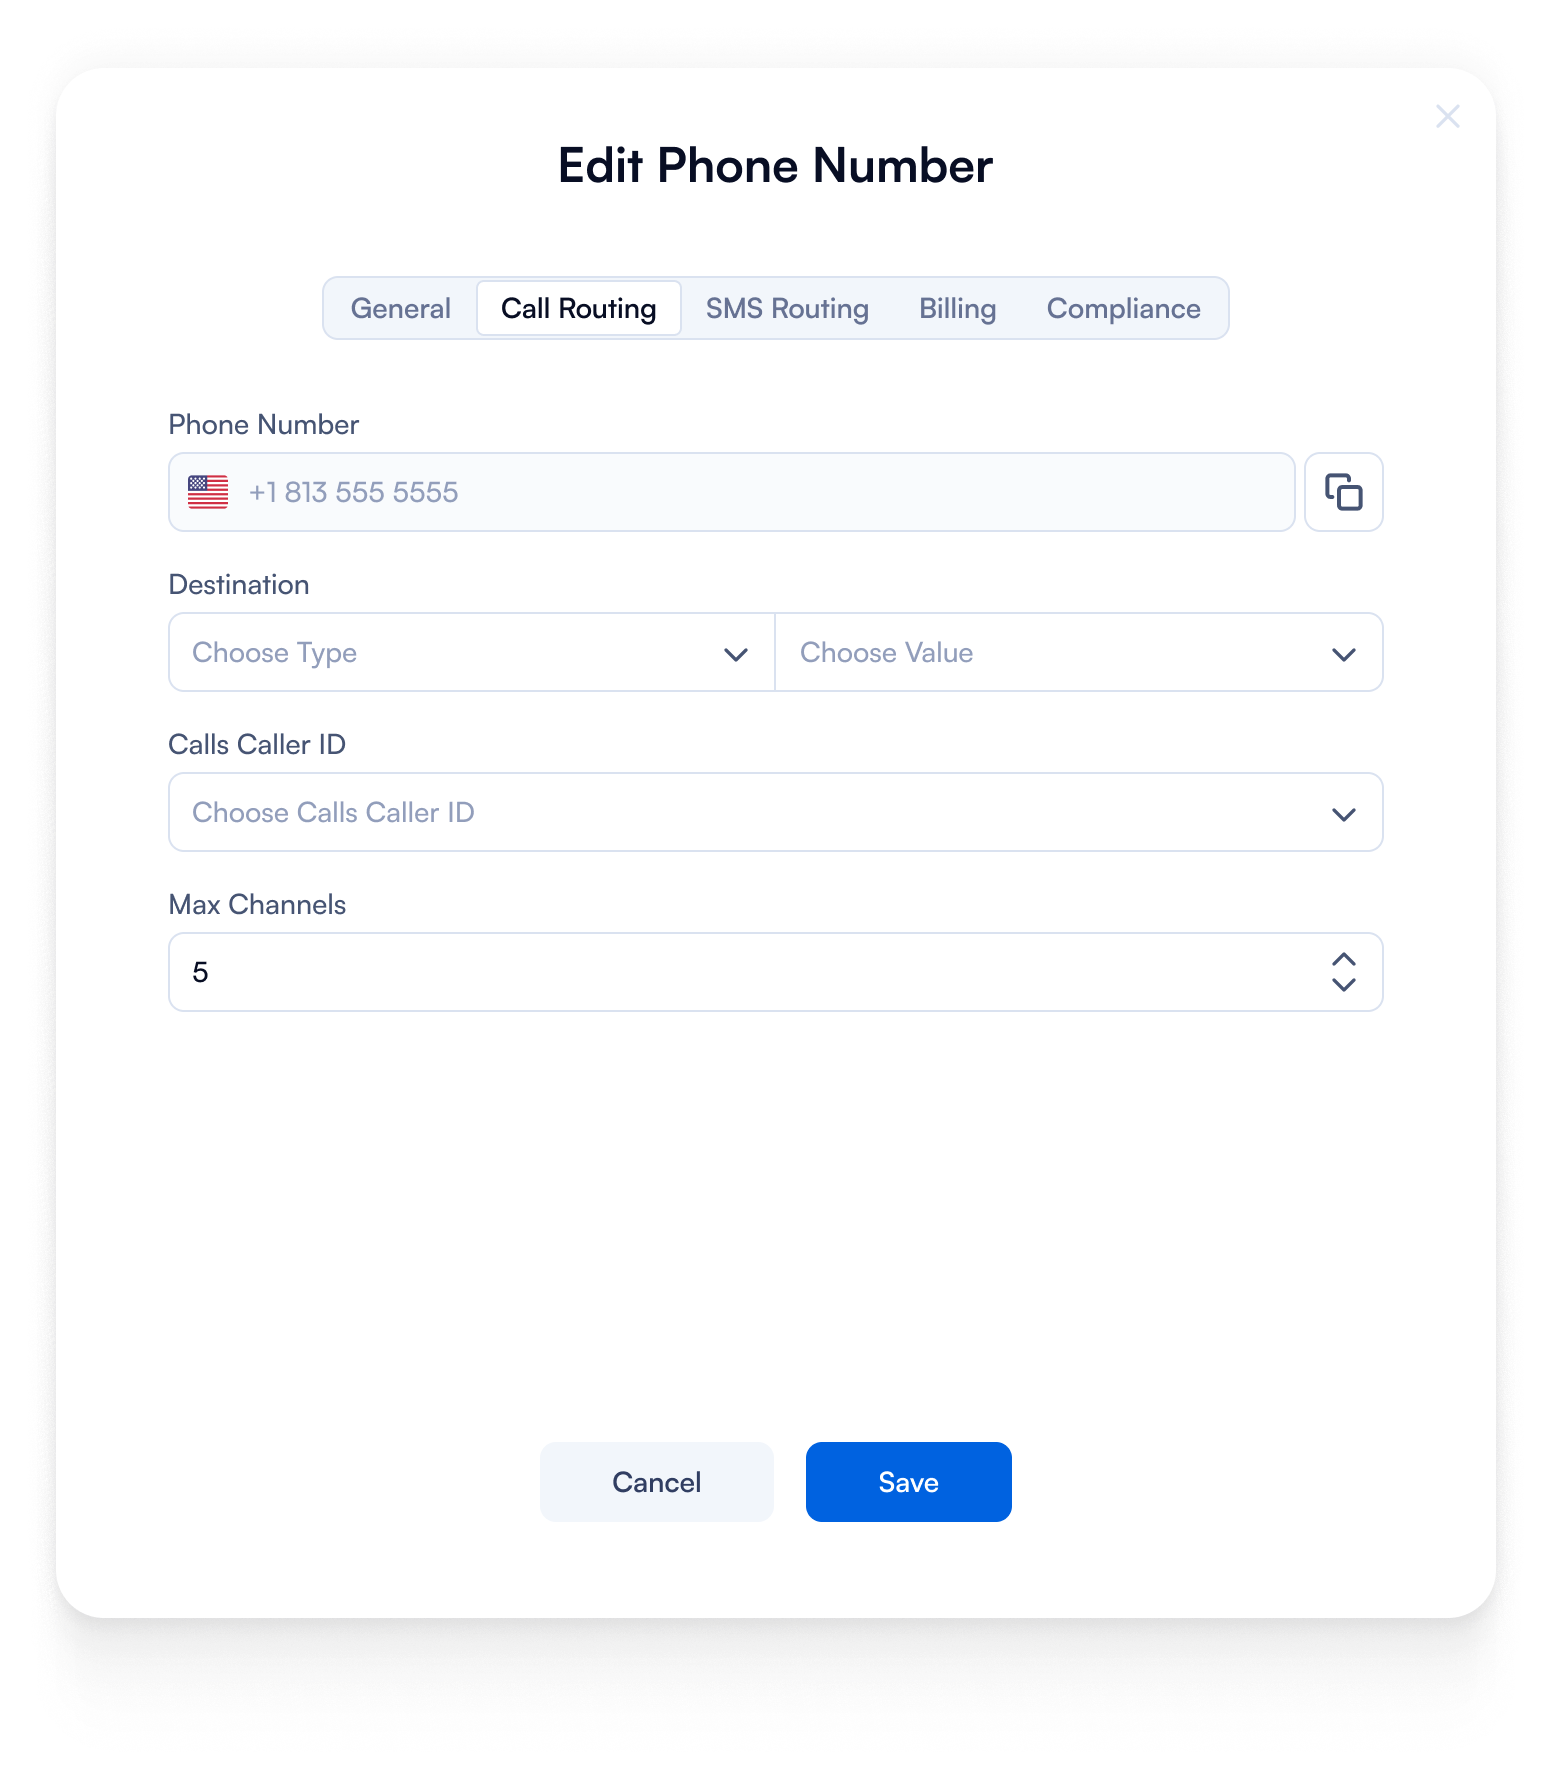
| Field | Description |
|---|---|
| Phone number | Shows which number you're editing |
| Destination | Decide where to send the call. |
| Calls Caller ID | Choose what number will appear as the caller ID when calls go out using this number. Useful for showing a company number instead of a personal one. |
| Max Channels | Sets the maximum number of simultaneous calls this number can handle. For example, if set to 5, up to 5 people can call in at once without getting a busy tone. |
SMS Routing
Similar to Call Routing, this tab is used to configure SMS settings. It allows linking the number to an Inbox and setting up general SMS routing preferences.
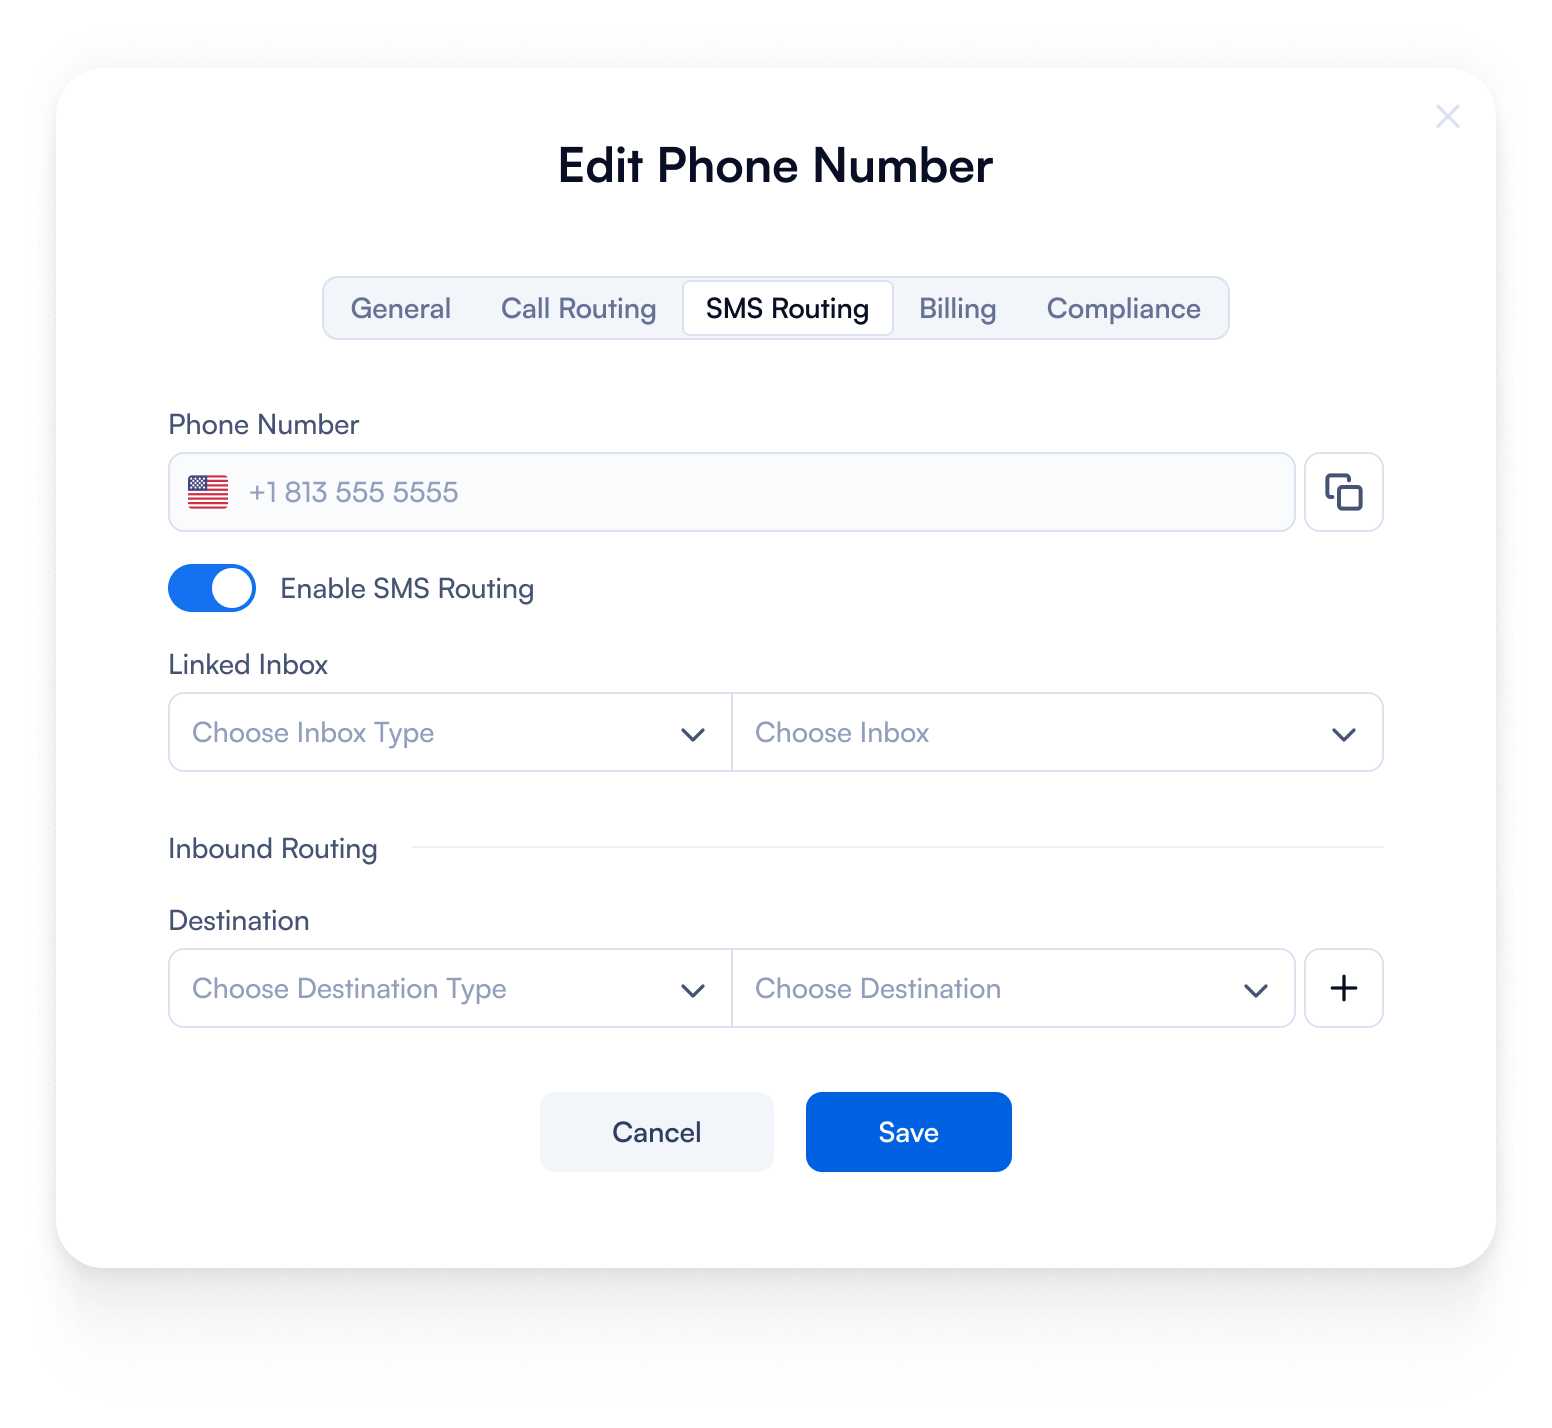
| Field | Description |
|---|---|
| Phone number | Shows which number you're setting SMS routing for |
| Enable SMS Routing | Turns SMS routing on or off. Options: Choose Inbox Type (e.g., shared inbox, user inbox) and Choose Inbox (pick where texts appear). |
| Inbound Routing | Choose who receives texts sent to this number. Options: Destination Type (route to a person, group, or system), Choose Destination (pick the recipient), and Plus Button to add additional destinations. |
Billing
In this section, you will view general cost information associated with that specific phone number.
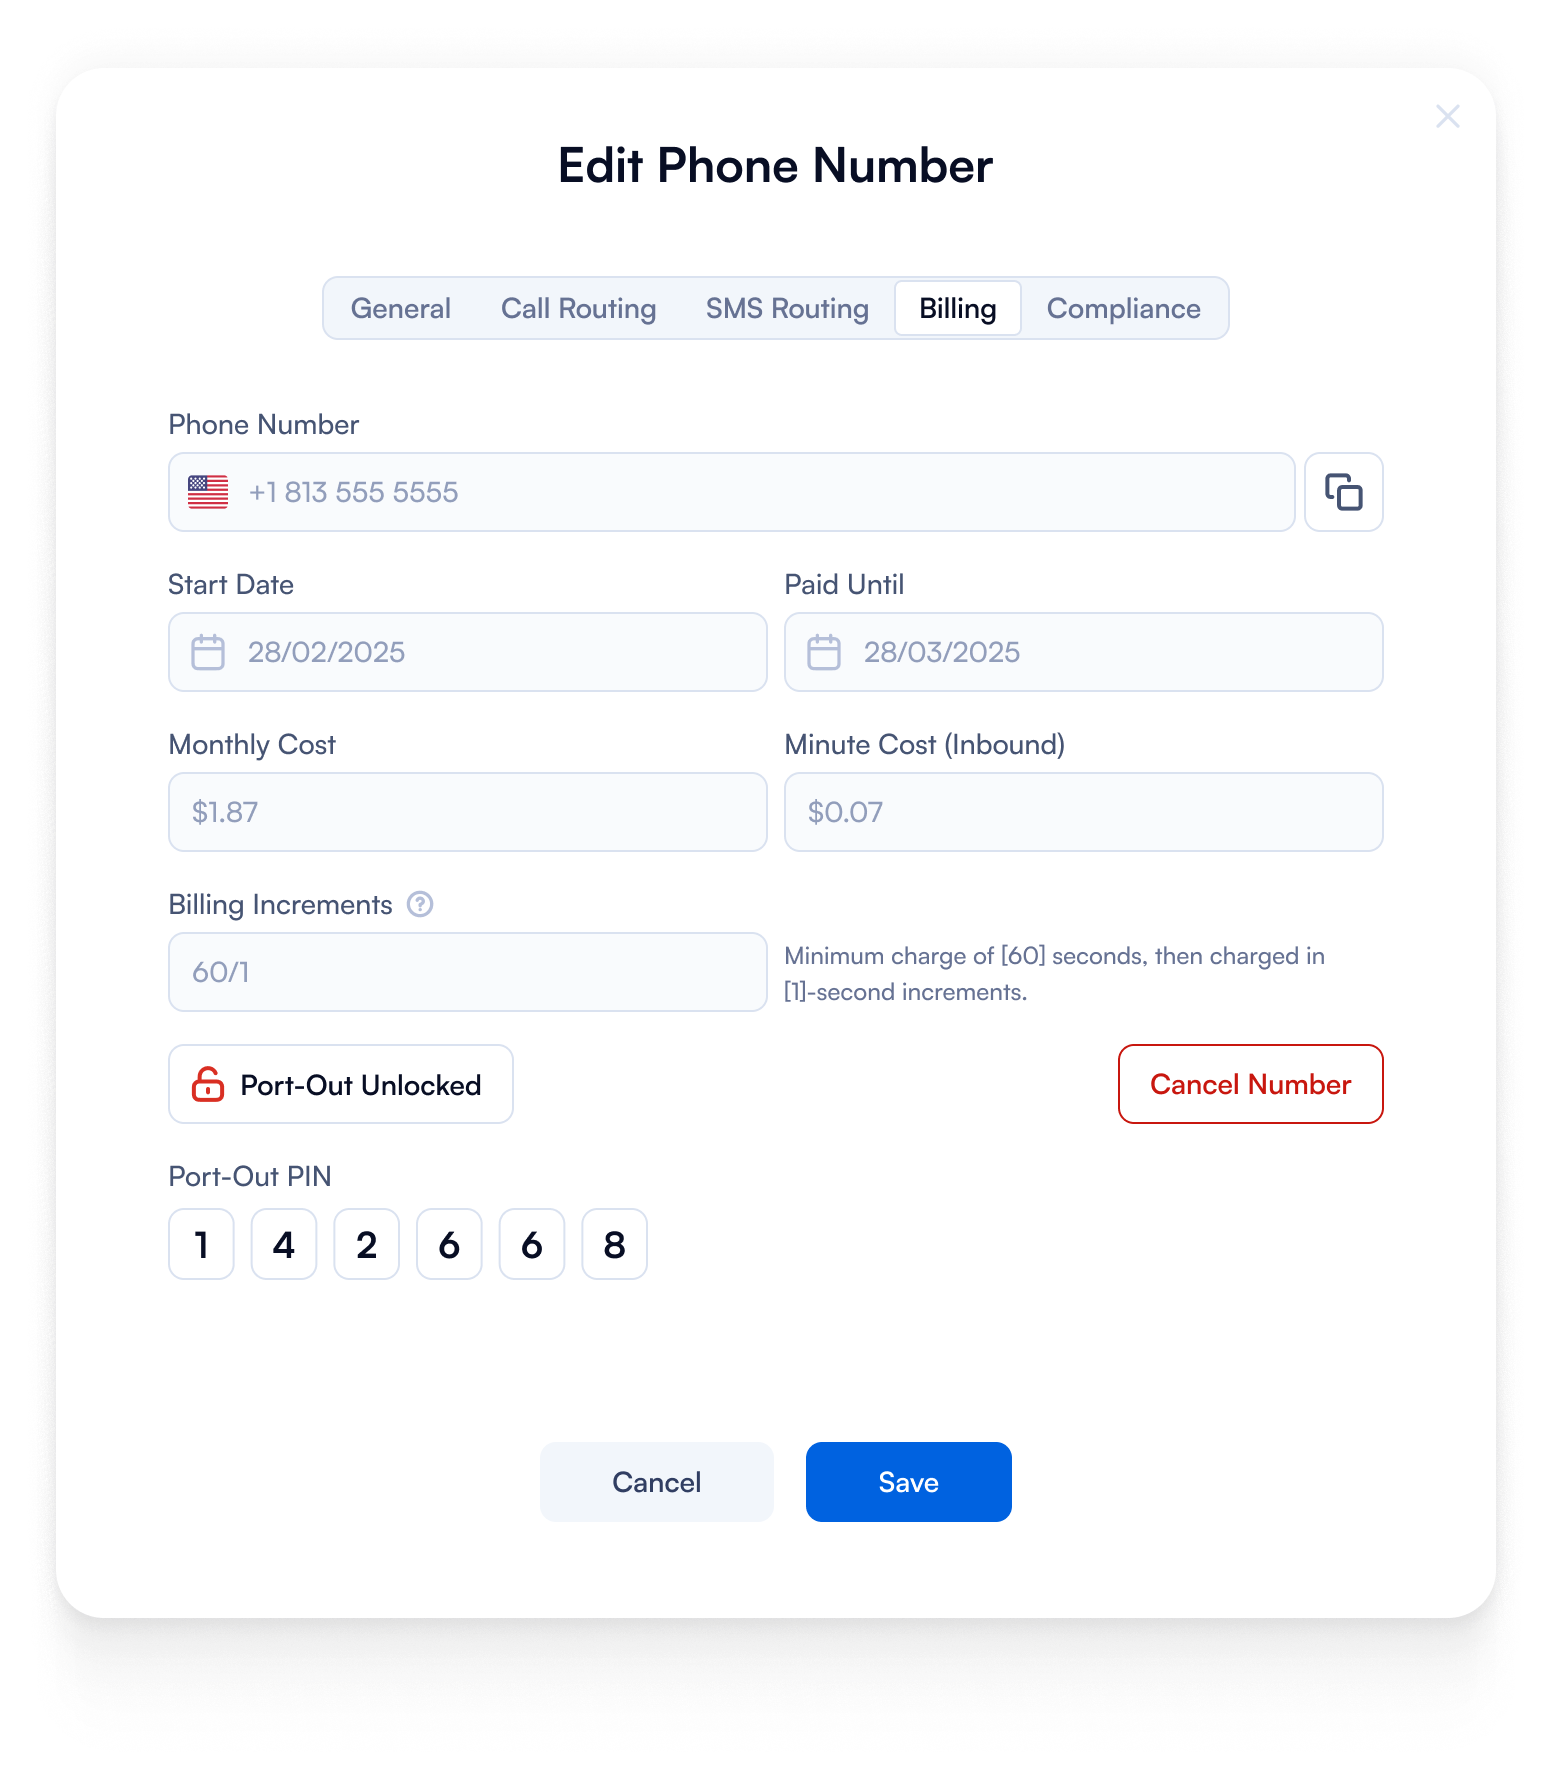
| Field | Description |
|---|---|
| Phone number | Shows which number you're reviewing or editing. |
| Billing period | Start Date: The date when billing began. Paid Until: The last date you've already paid for. |
| Monthly Cost | The sum you pay per month to keep the number active. |
| Minute Cost (Inbound) | The cost per minute for incoming calls to this number |
| Billing Increments | Defines how call charges are calculated. For example, 60/1 means the first 60 seconds are charged fully, then billing is per second. |
Compliance
Here you will find all the information and documents that you've attached while you've requested our service.
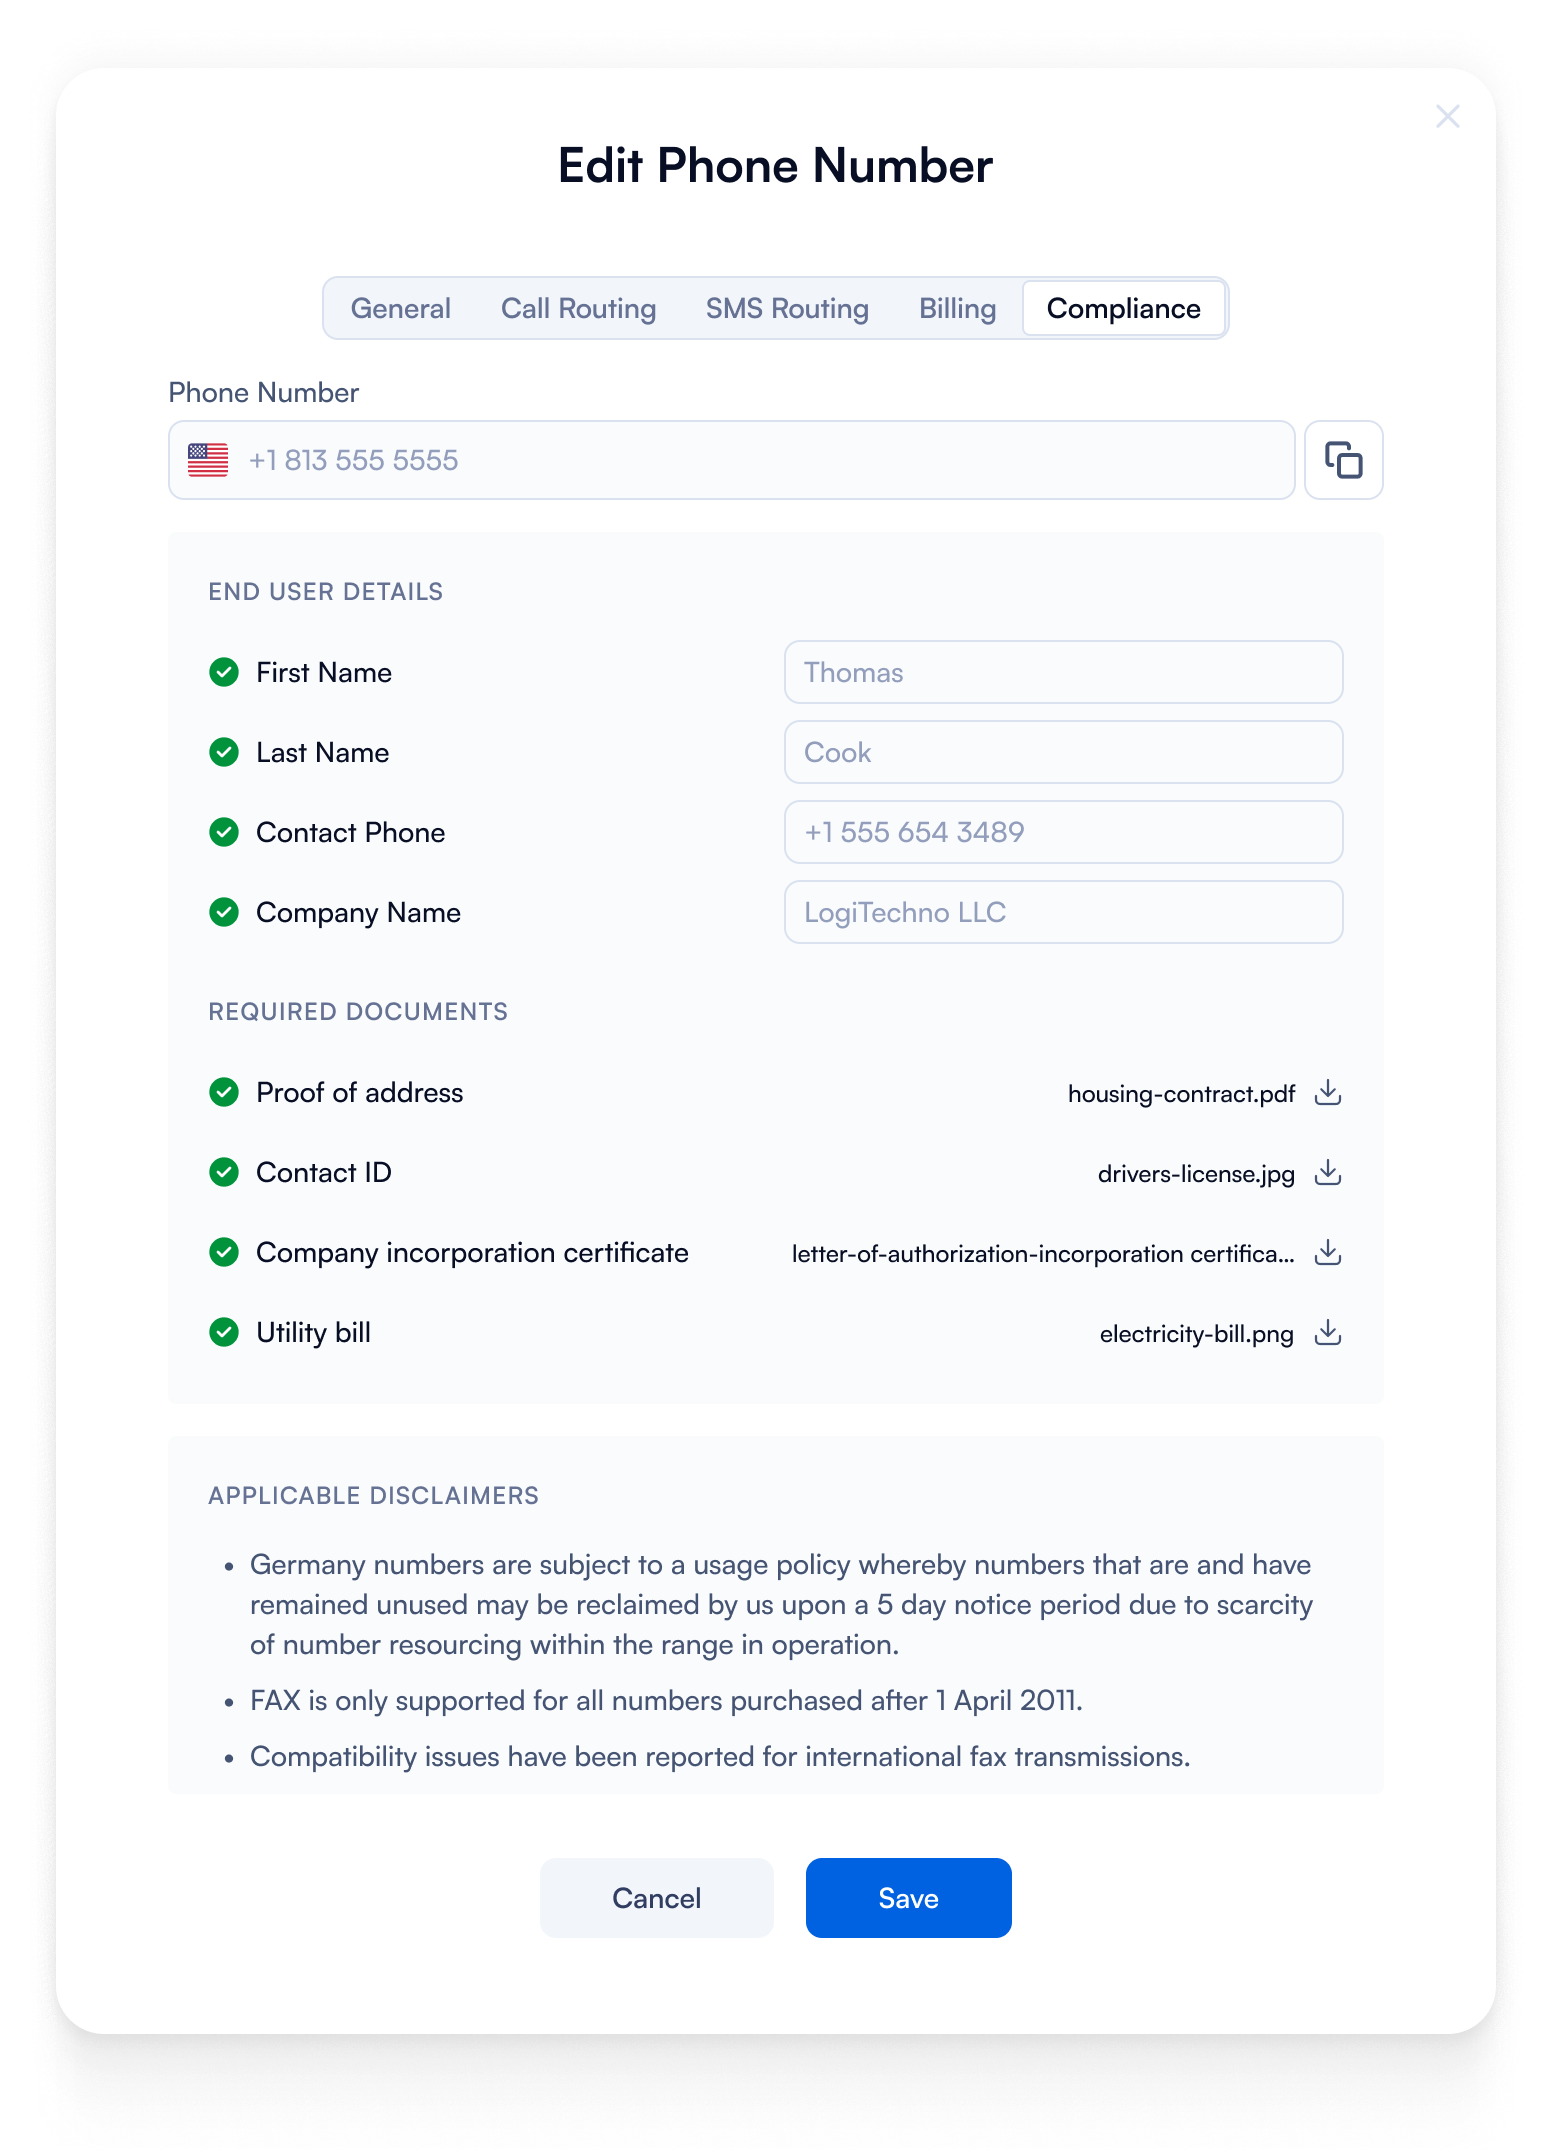
| Field | Description |
|---|---|
| Phone number | Shows which number you're reviewing or editing. |
| End user details | First Name / Last Name of the person responsible for the number, Contact Phone for reaching this person, and Company Name of the business using the number. |
| Required Documents | Documents that prove the identity and legal use of the number. |
How can I cancel my phone number?
If you'd like to cancel the subscription for the phone number, click "Cancel Number." Based on the configured rules, the number will be scheduled for cancellation. You can also abort the cancellation any time before the scheduled cancellation date.
How to Port Your Numbers to PBX.IM
Bringing your phone numbers to PBX.IM is a simple and streamlined process. Follow this step-by-step guide to initiate and manage your number porting request.
Step 1: Log In and Navigate to Phone Numbers
- Log in to your PBX.IM dashboard.
- Go to Call Routing and select Phone Numbers from the sidebar.
Step 2: Initiate a Port-In Request
Simply click on the “Port-in Number” button located next to the Add Numbers option.
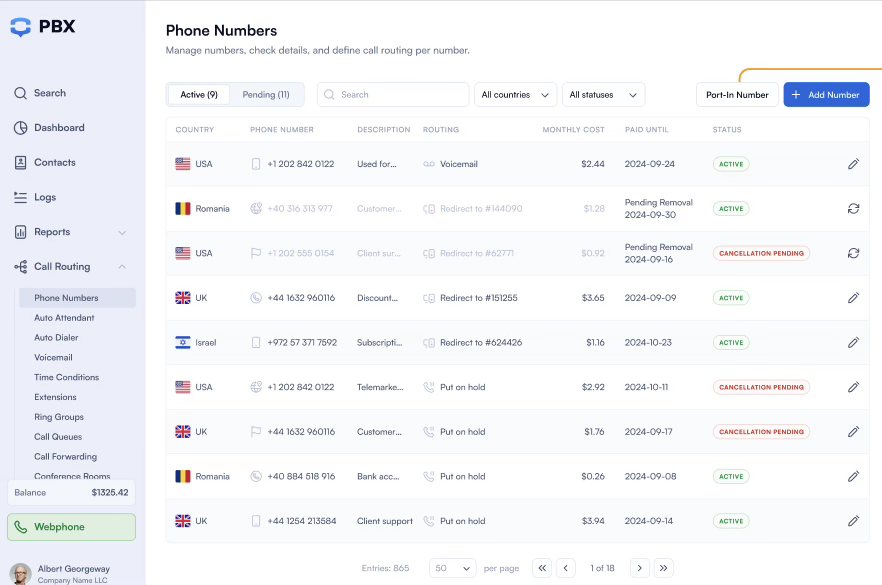
Step 3: Choose the Country and use case
Select the country associated with the number and choose whether the number is for Business or Personal use.
Step 4: Add the numbers you want to port in
Here you might have different scenarios:
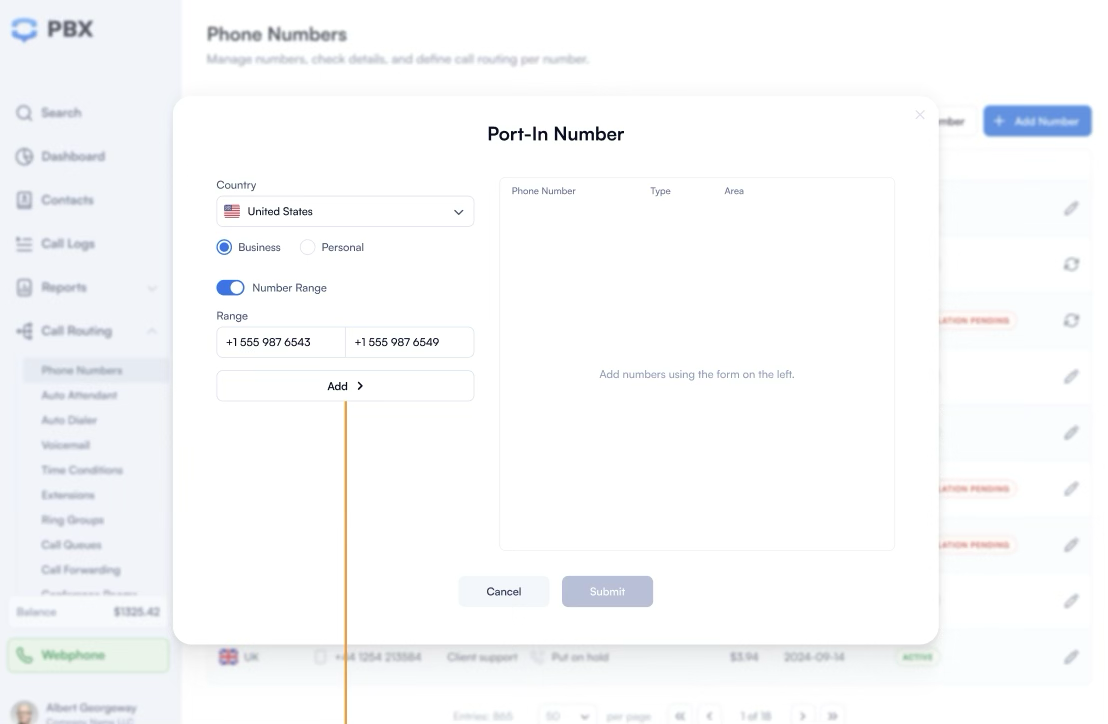
Scenario 1: Porting a Range of Numbers: If you're porting numbers in sequence (e.g., +1 656 555 121 to +1 656 555 130), enable the Number Range toggle. Enter the starting and ending numbers.
Scenario 2: Porting Individual Numbers
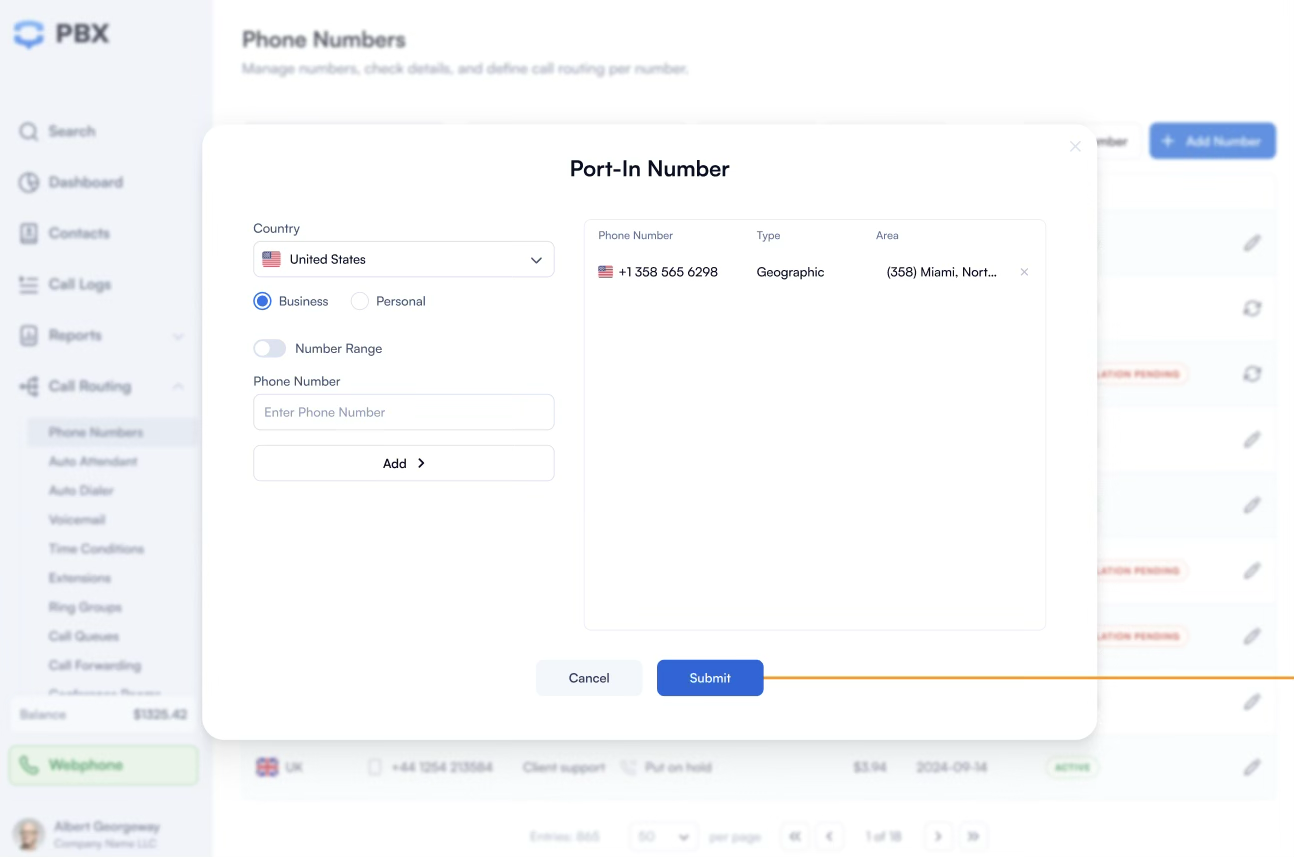
To add numbers individually, enter each number in the field provided and click the Add button.
Step 5: Review and Submit
All you have to do is verify that all the numbers are entered correctly.
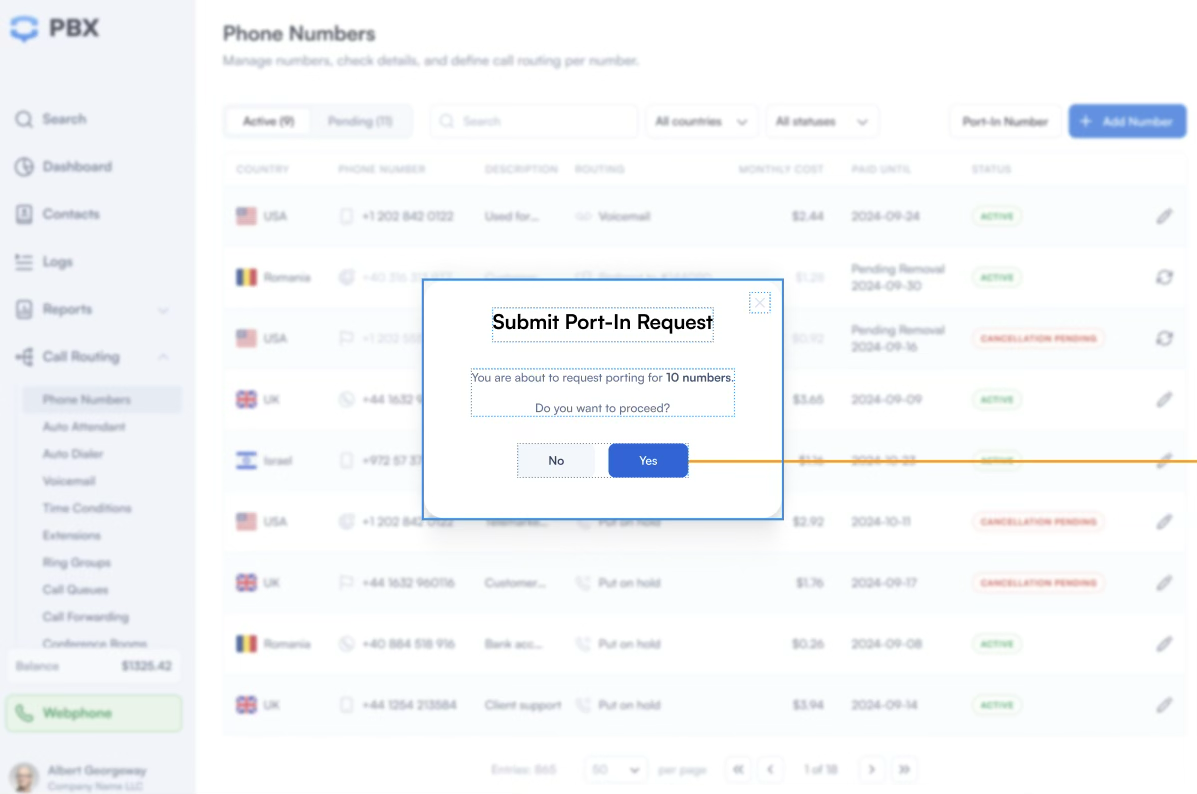
And click Submit to send your port-in request.
What happens after I submit a port-in request?
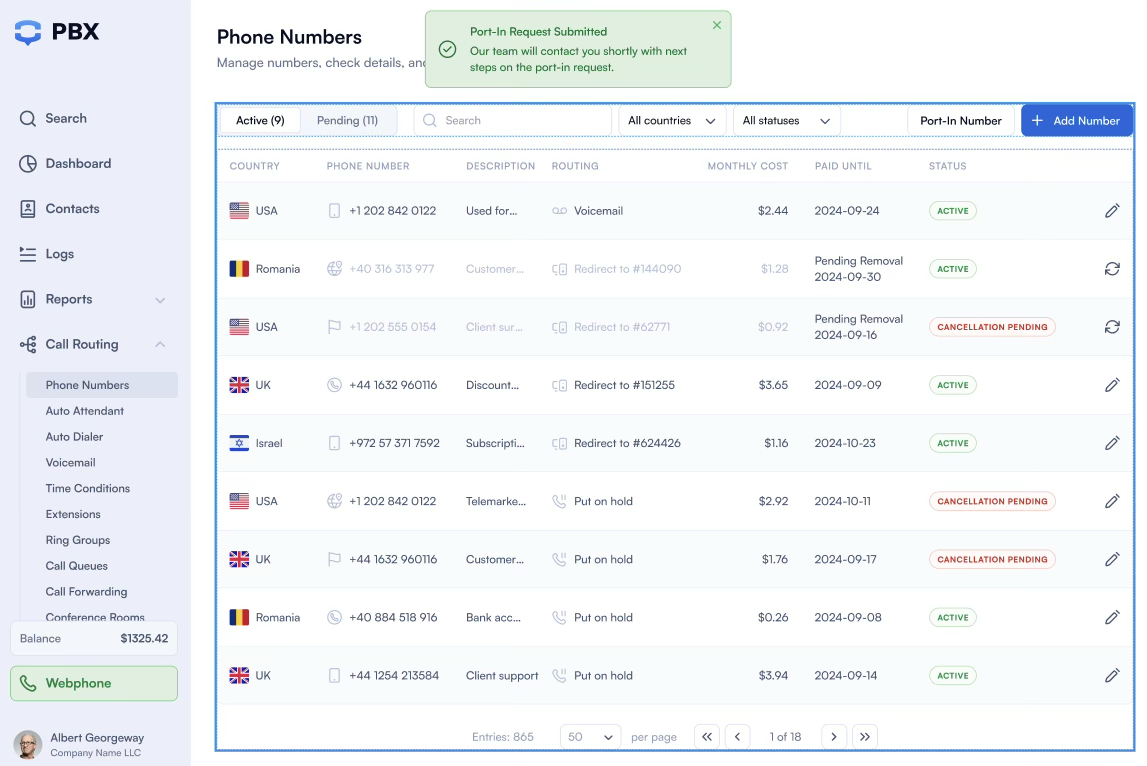
Once submitted, your port-in request will appear under the Pending tab in the Phone Numbers section. The request may be in one of the following statuses:
- In Review Your request has been received. Our team will contact you to collect the necessary documentation, such as a Letter of Authorization (LOA) and proof of identity, to proceed with the porting process.
- In Progress Your documents have been reviewed, and the number porting process has begun. Please do not cancel service with your current carrier at this stage. You may now configure the numbers in your PBX.IM account to ensure a smooth transition once the port is completed.
- Approved Your port-in request has been approved, and we are now awaiting the FOC (Firm Order Commitment) Date—the scheduled date on which your current provider will release the number to our carrier. On this date, the number(s) will be ported to PBX.IM and will appear under the Active tab. Once the number is active and fully functional in your PBX.IM account, you may proceed to cancel services with your previous carrier.
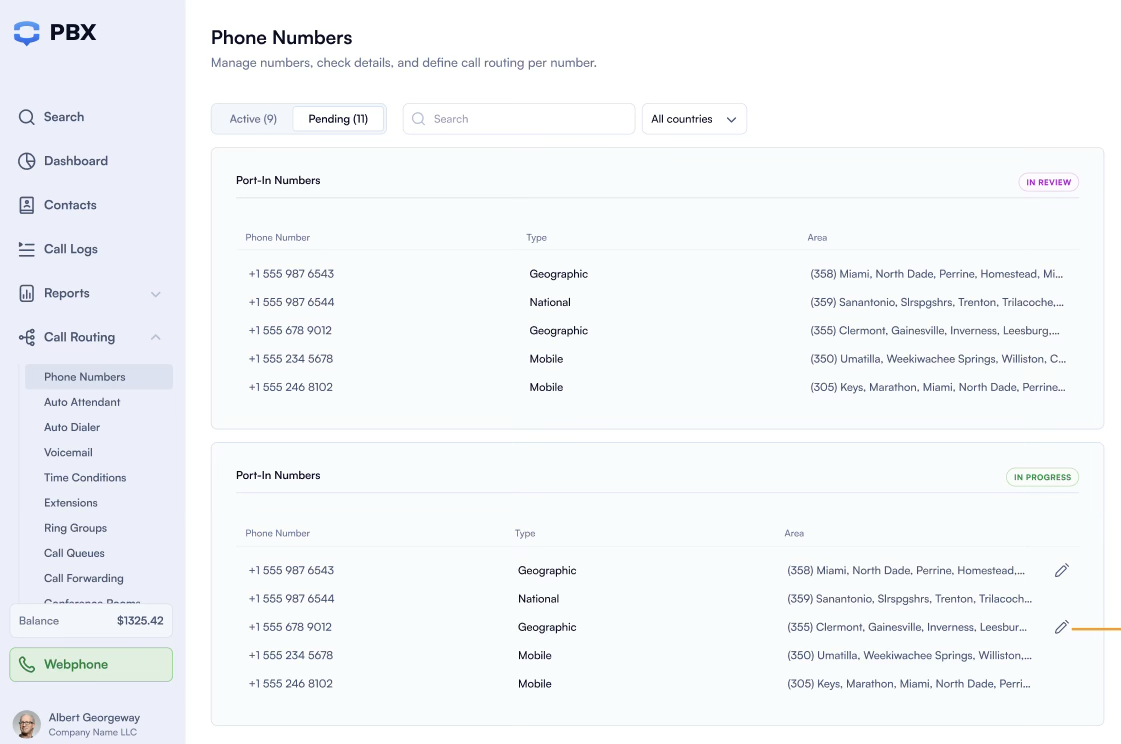
Can I still configure my number during porting?
While your port-in request is in In Progress or Approved status, you can configure your numbers in advance to ensure a seamless transition. This allows your numbers to begin working immediately once they are ported to PBX.IM.
To configure a number follow these steps:
Step 1: Navigate to the Phone Numbers section.
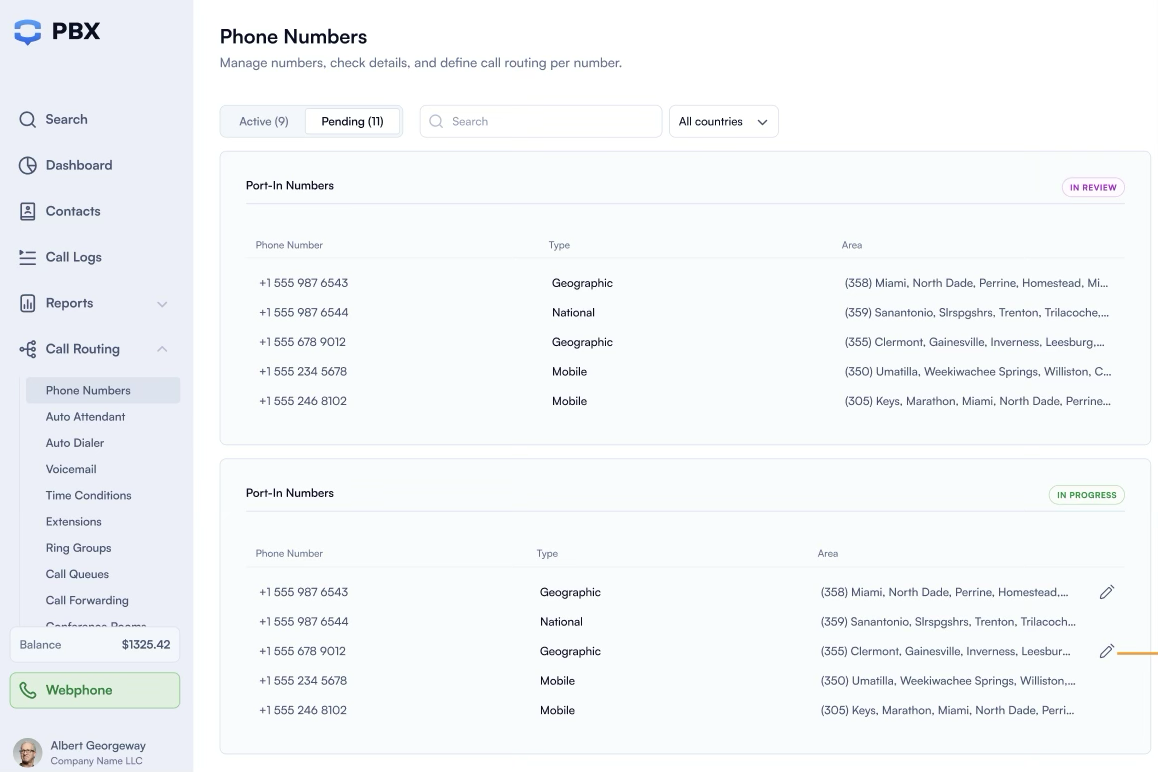
Step 2: Click the pencil icon to open the configuration panel
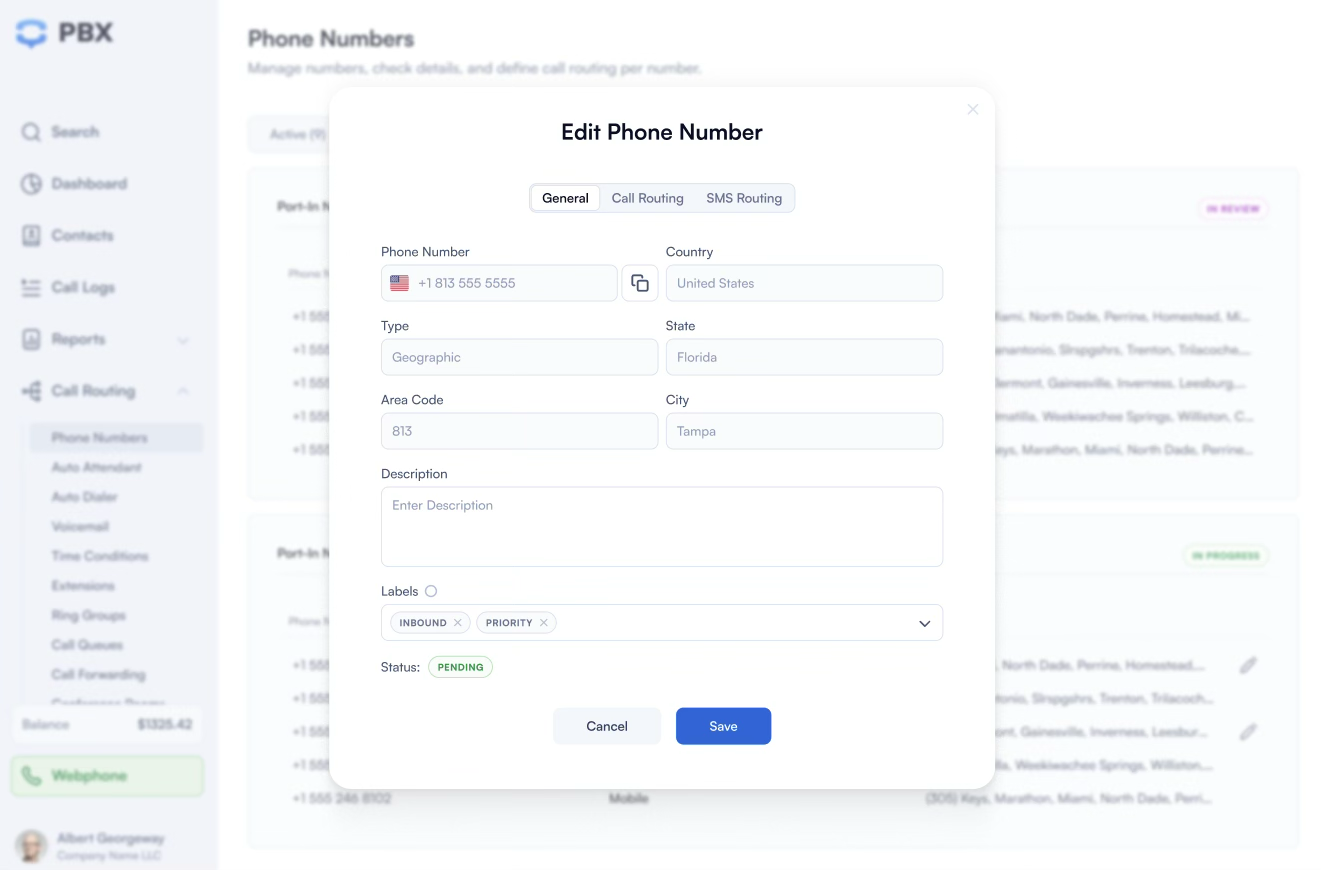
Step 3: Set up routing, call handling rules, and other settings to match your desired setup.
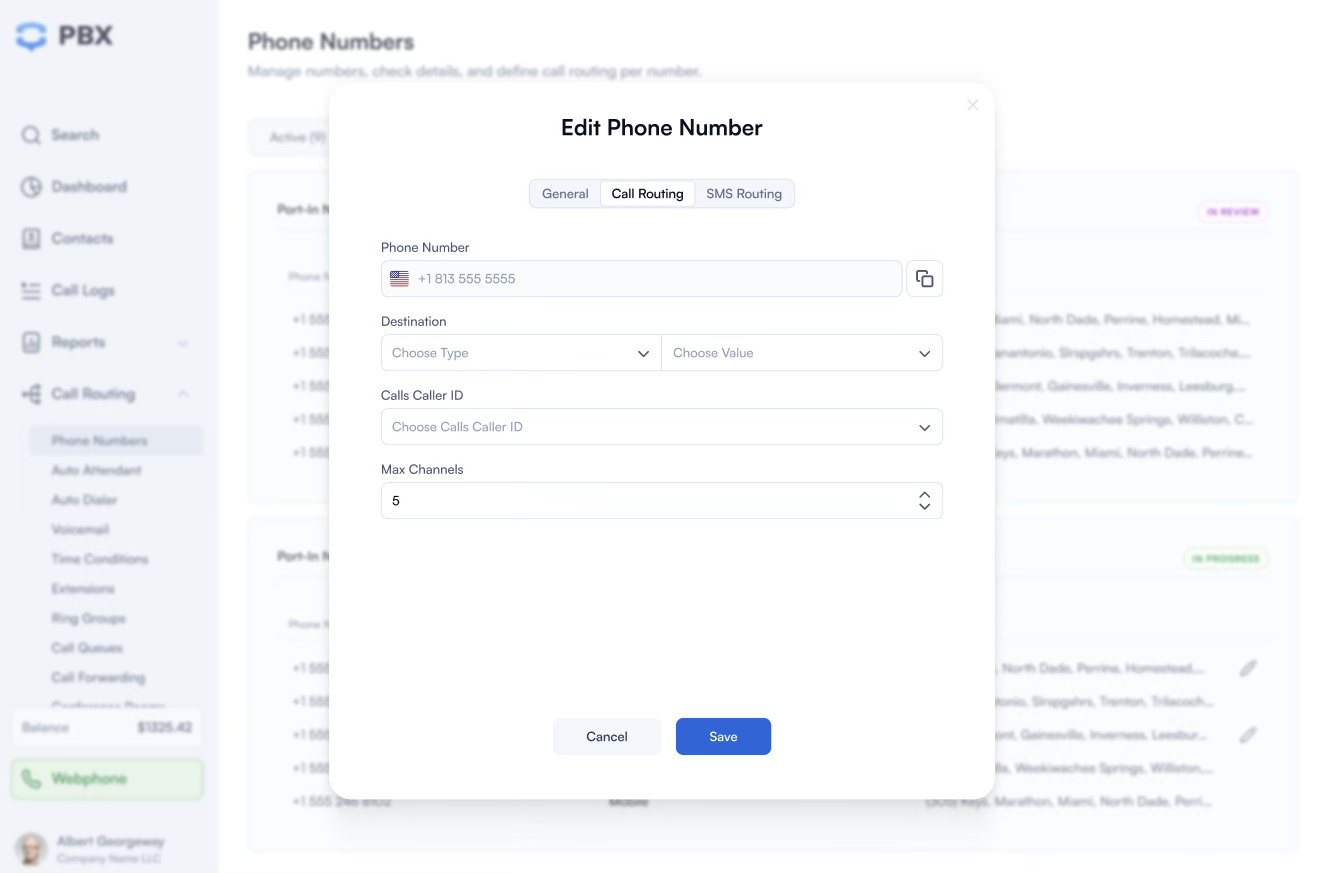
Preparing your numbers ahead of time ensures zero downtime on the FOC date. To learn more about configuring a phone number, see the Edit a phone number section above.
Important Note Once the port-in process is complete, all associated charges will be billed according to PBX.IM’s current pricing plans.